31.8.17

LAYERED BISCUITS - LEVELES POGÁCSA

The queen of pogácsa [po-gah-tcha] is layered!  Pogácsa is uniquely eastern European with no exact word for it in English. Hence the different translations. So then what are they? Are they scones, biscuits, lardcakes, puffs? Well not quite. But for convenience let’s just call them “biscuits”.

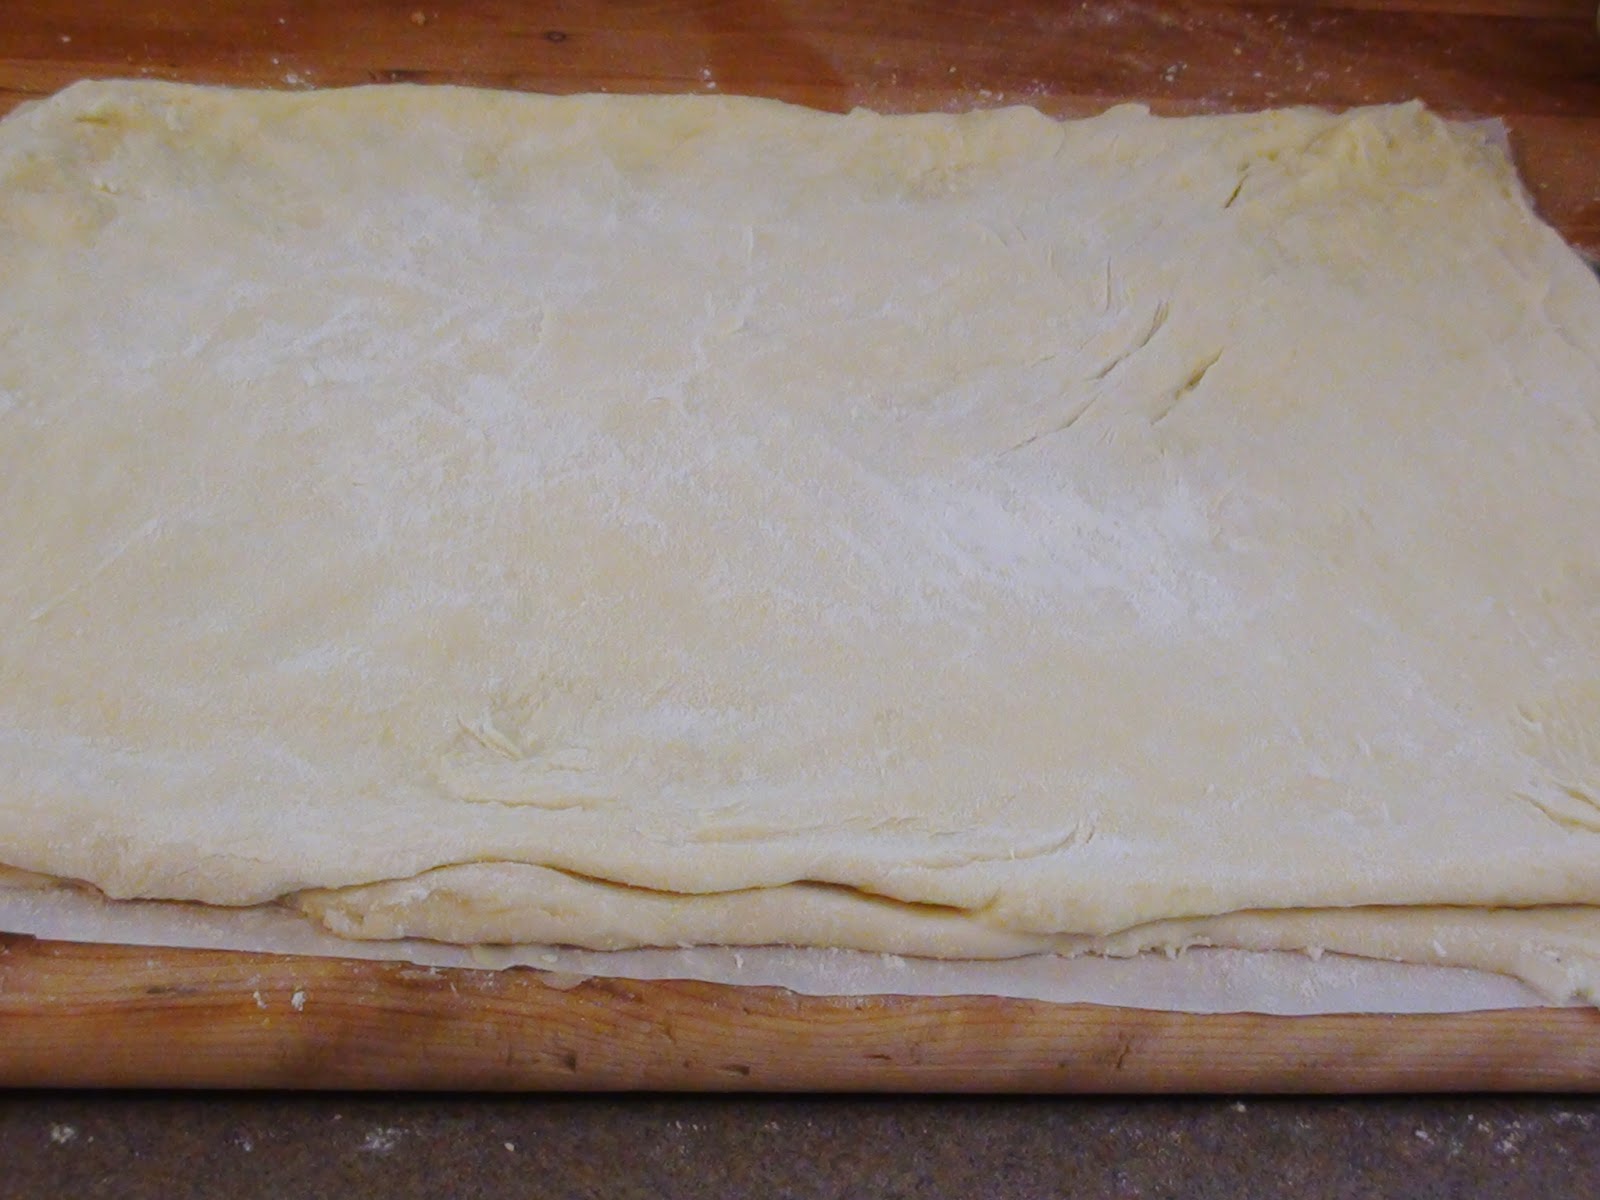
Layering in this case is laminating two different types of dough together with repeated folding and resting. The biscuits puff up in the high temperature and the result is a tray of addictively salty treat. Don’t make too much though, pogácsa is not a lengthy keeper.  

LAYERED BISCUITS
Dough 1:
1 cup flour
1/2 tsp salt
2 egg yolks
2 tsp fresh lemon juice
1/2 cup 14% sour cream
Dough 2:
1 cup flour
1/2 tsp salt
1/3 cup butter
1/3 cup lard
1 egg for brushing

  • In a medium bowl combine ingredients of the dough 1.
  • Kneed to form a dough.
  • Lightly sprinkle a sheet of parchment paper with flour.
  • Place dough 1 on top and sprinkle the top with a little flour.
  • Flatten the dough by hand, and with a floured roller, roll it into a 1/4 inch thick 14x11 inch rectangle. Add a little more flour if needed.
  • Set this aside.
  • Next combine ingredients of dough 2.
  • This will be sticky. Place it on top of the dough rectangle.
  • Sprinkle a little flour on top of the sticky dough and with your hands gently spread it over the entire rectangle.
  • You can use a roller, but first lightly flour the top and cover with plastic wrap. Dough 2 is very sticky and will stick to the wrap an/or the roller without a light sprinkle of flour.
  • When the two dough layers are roughly the same size, fold the dough in three.
  • Let the dough rest for 15 minutes.
  • Do a quarter turn, sprinkle with flour and roll it out again.
  • Make sure the short side of the rectangle is always facing you before you fold.
  • Repeat resting and folding twice more.
  • When nearing the second rest turn  the oven on to slightly above 400F.
  • Line a baking sheet with clean parchment paper.  
  • After the last rest, roll out the dough to 2 finger thickness.
  • Score the top in a crosshatch pattern.
  • Brush the top with lightly beaten egg. It is important to brush the top with the egg at this stage. You don’t want the egg yolk running down the sides of the biscuits, this would result in much leaning. The aim is to have straight, evenly risen biscuits. 
  • Cut out as many rounds as you can and place them on the prepared baking sheet. The size of the cutters is personal preference, you can always experiment. Personally I prefer medium sized biscuits.
  • Do not reroll the scraps, lightly guide them into a round grouping  and bake them as they are. The resulting pull-apart is every bit as tasty as the biscuits.
  • Place them in the preheated oven.
  • Bake until the tops are golden brown.
  • These are best fresh. Store leftovers on a tray, covered with a clean serviette.
  • Do not store these biscuits in a plastic container. Do not reheat.


30.8.17

BEST AND WORST BAKING PANS


I had this $15.00 aluminum cake pan for the past 15 years.

I finally threw away the heavy gauge aluminized steel baking sheet I bought at a home party for a pretty penny a couple of years ago. I looked around the stores and was thoroughly saddened by what the manufacturing industry is pushing on the consumer. I found the cost is immaterial. All those wonderful baking pans from cheap to very expensive and none of it worth a dime! 

What do bakers and pastry chefs use? The professional baker’s choice is heavy gauge ALUMINUM: Those that stand up to 3 years of commercial and 70 years of home use. Where can you get them? Granted not everyone has access to a restaurant supply store, but there are aluminum baking pans out there... you only have to look. Don’t waste your time with aluminum coated pans, look for Double-Thick Aluminum. These will give you years of baking pleasure despite the occasional burning disaster. 

Forget the dark baking pans, the coated and non-stick pans sold in department stores, the pampered bake ware from home parties, the expensive stainless steel or the cheap dollar store pans that warp and burn everything. If it is a steel or tin underneath the pan will rust. Be it thin or heavy construction coated pans do not stand up to scorching and scouring. I am not sure where stainless steel baking pans belong. Is it a case for I don’t bake too often or I like to have expensive things? Stainless steel is a poor conductor of heat, that is a fact, and in all probability will not heat evenly. Beware of new inventions... The latest craze is stoneware cookie sheets. I potted long enough to know how fragile stoneware is in the oven especially in square and rectangular configurations.   

If you are concerned about using aluminum, the baking pan should be lined with parchment paper anyway. Lining with parchment cuts down on cleaning substantially. Soak the pan and take the scouring pad to it, just don’t put it into the dishwasher. The aluminum will come out coated with nasty and a couple of hours of elbow grease will be required to restore it to its former glory. Still it will be salvageable. Not many baking pans would be after a cycle in the dishwasher.


These aluminum baking trays are brand new and the two was just under $22.00. I found them on a corner rack of an Italian deli next to the sausage making equipment.
 

24.8.17

FLUDEN - FLÓDNI

Jim remains a beigli fan, but flódni will forever bring mist to my eyes. All I can say is you haven’t lived until you tasted flódni.

I long suspected we had Jewish ancestry on our mother’s side. Mother’s mom hid her and her sister during the last days of the war. Plus there are telling names on old documents. My brothers would vehemently dispute it, but when they checked out the Kazinczy utcai synagogue in the eighties, the old rabbi took one look at them and began to cry, “Here come our young people”. DNA doesn’t lie, but all they would have to do is look in the mirror. I never had flódni before, only heard about it a few years ago. Our paternal grandmother lived with us and ran the kitchen. Nagymama was originally from Szeged, she and my dad... they were terribly proud of their Székely ancestry.

Ah my mother...
his picture was taken shortly after the war. In the background, there is the bombed Széchenyi Chain Bridge; the first bridge ever to unite Buda with Pest.  During the war with Austria in May 1849, the Austrians planned to blow it up, which the retreating German army succeeded in 1945, along with all the other bridges that stretched across the Duna. The Széchenyi Chain Bridge reopened in full glory four years later, the year I was born.

A while back someone asked me to make flódni. Nearing the 1000th recipe I would be remiss if I didn’t give flódni a chance. As it turns out, flódni is not as complicated as it looks. You have to be organized, how the saying goes? Can’t hurry a good thing. 
Start with the fillings. Poppy seed filling should be first, it is the most time consuming. Following with apple filling and  walnut filling. 

1. Poppy Seed Filling: 1-1/2 cups poppy seeds, 1/2 cup sugar, 1 Tbsp honey, 4 Tbsp butter, finely grated rind of 1 lemon, 1/2 cup water, 1/8 cup white wine, 1/4 cup raisins
If you can get ground poppy seeds, omit the heat treatment and just make the filling.

Heat Treatment:
  • Preheat the skillet at a LOW MEDIUM. Do not to start out with high heat. Even if you turn down the heat before you add the seeds, the pan will be still too hot. Poppy seeds burn easily and turn bitter on high heat. Give it time, don’t hurry the process.
  • While the pan heats up, line the bottom of the baking pans with parchment paper.
  • Spray the parchment paper and the sides of the pans with cooking spray and set them aside.
  • When the pan is thoroughly heated on low medium, add the poppy seeds, gently stirring with a heat proof plastic spatula. [gently, because the seeds can scrape the coating of the pan]
  • Keep stirring until the seeds begin to steam a little.
  • Continue to stir for 1-2 minutes longer and then remove the skillet from the heat.
  • Transfer the poppy seeds to a large chilled bowl to cool.
  • The seeds must cool down to room temperature before starting on the filling.
Make the filling:
  • Place all ingredients in a saucepan.
  • Bring to a boil over medium heat while stirring, then reduce the heat to low and cook for 5 minutes, stirring occasionally.
2. Apple Filling: 5 apples, 2 Tbsp sugar, juice of 1 lemon, dash of cinnamon, 1/2 cup white wine
  • Core and peel and grate the apples.
  • Squeeze out the juices. Discard or set the juice aside for different use.
  • Add the rest of the ingredients.
  • Place in a medium sized pot and on low medium heat slowly cook until all the liquid evaporates. Stir often.
3. Walnut Filling: 1-1/2 cups ground walnuts, 1/2 cup sugar, 1 Tbsp honey, finely grated rind of 1 orange, 1/4 cup water, 1/8 cup white wine, 1/4 cup raisins
  • Place the finely ground walnuts in  medium sized pot.
  • Add the remaining ingredients and on low medium heat slowly cook to spreadable consistency.
4. Once the fillings are ready, set them aside to cool and start on the pastry.

5. Jam Layer: For the jam layer set aside 1/3 of a cup very thick plum jam, preferably Hungarian plum lekvár. If the jam is runny use less.

6. 1 egg yolk for spreading

7. Make the Pastry

3-1/2 cups flour, 3/4 cup cold butter cubed, 3/8 cup icing sugar, 1 pinch of salt, 1 tsp instant yeast, 3 egg yolks, 100 ml dry white wine 

  • Rub the cold butter into the flour.
  • Add the icing sugar, salt and the instant yeast. 
  • Stir to combine.
  • Add the egg yolks and the wine and kneed into a soft pliable dough. 
  • Wrap and refrigerate for 1/2 hour. 
7. Assembly:
  • Take the dough out of the fridge and set the oven to 350F.
  • Divide the dough into 5 equal parts.
  • Roll out the first dough to fit a 9X13 inch baking pan. 
  • Spray the pan with cooking spray.
  • Lay the first layer with the rolled out pastry, bringing it up the sides about half an inch or so.
  • Spread the fist layer with the walnut filling.
  • Roll out the second layer to fit the pan and spread the top with the poppy seed filling.
  • Roll out the third layer and spread the top with the plum jam.
  • Roll out the fourth layer to fit the pan and spread it with the apple filling.
  • Roll out the last layer to fit the pan and lay it on the top.
  • Press down lightly and spread it with the egg yolk.
  • Place in the preheated 350F oven and bake for 50-60 minutes or until the top is golden brown.
  • Let the fluden cool and cut into serving sized rectangles.  
“Talán az egyetlen dolog, amit még totál kopaszon, nagymagyarországos bomberdzsekiben is csak csukott szemmel, és elnyújtott kéjes hümmögéssel lehet falni. Szférák zenéjét idéző finomság mákkal, dióval és almával.” source 


15.8.17

THICKENING VEGETABLE STEWS - FŐZELÉKEK SŰRÍTÉSE


Roux
Even after fifty years in Canada, I am completely satisfied with a bowl of fresh vegetable stew. But this was a problem in 1967. I knew that főzelék or vegetable stew required rántás [roux] or habarás [slurry] to thicken so I wrote home for help. The turn around for mail those days could be three to four weeks, and in the meantime I kept on making "wallpaper paste". My roux sometimes was so thick the spoon stood up in the pot. Lumpy too. Roughly a month passed before I began to receive instructions how to make roux. It would begin with “put some lard in the pot, add some flour...” It never entered their minds to write down the steps for me. I soon realized I could not rely on my family for cooking. The struggle with roux continued and I was making less and less főzelék as the years went by. You might say I was roux challenged. No matter what I did, my roux was always lumpy, either too thick or it simply failed to thicken the vegetable stew. Often times I had the painstaking task of forcing it through a sieve, then it would lump up again in the hot broth. If you share my bewilderment with roux... this one is for you. 

There is more than one way to thicken a vegetable stew. You can use nut meal, coconut milk, heavy cream, mashed potatoes, potato flakes or a small amount of puree made from the vegetables. Some methods are more satisfying than others. But the most common thickening agents for Hungarian vegetable stew remains to be roux or slurry.
 
Chop the vegetables uniform and put them in a pot. Add hot water barely covering the vegetables. Bring it to a slow simmer. Cover the pot and continue to simmer until the vegetables are tender. Remove the pot from heat and set it aside. Next make the roux. The components of roux is fat and flour, roughly half and half in volume. Always start with the fat. Heat it up on medium low heat before you add the flour. If the fat is butter, melt the butter just, don't heat it up too high, butter on its own burns easily. Add the flour gradually, maybe you will need less maybe more. This will depend on the type of fat and flour you use. Stir the flour into the fat and cook it for 2-3 minutes. Remove it from heat before you add the seasoning. Seasoning burns in roux and you end up with a bitter taste. Now add cold liquid, always cold and never hot. Stir to combine to a smooth paste. The next step is what every roux instruction leaves out. Diluting the roux with cold liquid is the most crucial part of thickening with roux. When you stir in the cold liquid you get a lukewarm slurry, this lukewarm slurry  is what you add to the pot. Stir and slowly bring it back to a simmer. Continue to simmer until your stew has the desired consistency.


THICKENING VEGETABLE STEWS

Roux:
2 Tbsp oil or lard or butter
2 Tbsp flour

  • Begin by heating 2 tablespoons oil or fat in a saucepan over medium heat until a pinch of flour sprinkled in the oil begins to bubble.
  • Stir in 2 tablespoons of flour to form a paste. 
  • Continue stirring as the roux gently bubbles for 2 to 3 minutes. Do not cook longer.
  • Remove from heat and stir in the seasoning such as paprika or chopped up herbs if desired. Do not cook the roux with the seasoning or it will turn bitter.
  • Add 1/2 of a cup of cold liquid: water, stock, or the cooled down broth from the stew.
  • Stir smooth. You now have roux.
To Thicken with Roux:

  • Add the roux to the slowly simmering stew and continue to slow simmer until the desired consistency. Do not cook it longer than 2-3 minutes, because continued cooking will eventually break down the flour and the liquid will be thin again.
  • This amount is sufficient to thicken 2 cups of liquid.
    You can make roux ahead of time, freeze it in small blocks and use it as needed. Works rather well, but this method requires planning ahead. Check out the following video.


    Slurry:
    2 Tbsp flour or cornstarch
    1 cup cold liquid

    • Add the flour or cornstarch to a small bowl and gradually stir in the cold liquid.
    • Stir until a smooth. This is the slurry.
    To Thicken With Slurry:

    • Whisk the cold slurry into the hot, simmering liquid you want to thicken.
    • Bring it back to simmer and continue in a slow simmer for 2-3 minutes or until the starchy taste is cooked away. Don't cook longer or the starch will break down and the liquid will be thin again. This will thicken 2 cups of hot broth.
       
      Slurry
    Note: When thickening stews with slurry, a small piece of butter or a few tablespoons of full fat sour cream helps with the flavour. Cooking low fat sour cream into the stew tends to break apart into floating white bits. So if you insist on using low fat sour cream, add it at the table. 

    Privacy & Cookies

    This site uses cookies. By continuing to use this website, you agree to their use. To find out more, including how to control cookies, see here: Cookie Policy

    Translate

    me

    My photo
    It began with posting a few recipes on line for the family. "zsuzsa is in the kitchen" has more than 1000 Hungarian and International recipes. What started out as a private project turned into a well visited blog. The number of visitors long passed the two million mark. I organized the recipes into an on-line cookbook. On top of the page click on "ZSUZSA'S COOKBOOK". From there click on any of the chapters to access the recipes. For the archive just scroll to the bottom of the page. I am not profiting from my blog, so visitors are not harassed with advertising or flashy gadgets. The recipes are not broken up with photos at every step. Where needed the photos are placed following the recipe. Feel free to cut and paste my recipes for your own use. Publication is permitted as long as it is in your own words and with your own photographs. However, I would ask you for an acknowledgement and link-back to my blog. Happy cooking!