22.2.14

BACON ROASTED CAULIFLOWER

The texture and flavour are both delicious. The recipe for roasted cauliflower with bacon is so simple I am not even sure there is need for a recipe. I love cauliflower and will eat it happily any way prepared. Just roast it for 20 minutes at 400F and then sprinkle it with parmesan cheese or not. Adapted from Spinach Tiger 

BACON ROASTED CAULIFLOWER
1 head of cauliflower 
1 tsp olive oil 
salt to taste 
2 slices of slab bacon 
shaved parmesan cheese for sprinkling 

• Preheat oven to 400F. 
• Trim the cauliflower and cut in into rosettes. 
• Toss with olive oil and salt. 
• Arrange the cauliflower rosettes in a casserole dish.
• Cut bacon into 2 inch pieces and arrange over the cauliflower. 
• Bake for approximately 15-20 minutes. 
• Sprinkle the top with shaved parmesan cheese if desired.

COTTAGE CHEESE DUMPLINGS - TÚRÓ GALUSKA

Cheese Dumplings [Käse Spätzle] or Túró Galuska is an Austrian dish made with either farmer’s cheese or with drained cottage cheese. It is best eaten with sauerkraut and caramelized onions. It takes a little while to drain the cottage cheese, but the actual preparation goes fairly quickly. As far as pasta dishes go, Cheese Dumplings are fairly light, because cottage cheese is the dominant feature and not the flour. Cheese Dumplings can also be eaten sweetened, but in general it is known as a savory dish. 

COTTAGE CHEESE DUMPLINGS
1-1/3 cups well drained 2% cottage cheese 
1-1/3 cups flour 
salt to taste
3 eggs, lightly whisked 
1/3 cup melted butter 
1/3 cup crispy bacon bits [optional] 
2 sprigs of fresh dill weed chopped [optional] 

• Drain a 500ml tub of 2% cottage cheese for a couple of hours. 
• Set aside the liquid for some other use. 
• Put a large pot of water to the boil. 
• Place the drained cottage cheese in a bowl. 
• Using a potato masher, break up the curds as best as you can. 
• Add the flour, salt and combine. 
• Stir in the whisked eggs. 
• Let the dough rest for half an hour. 
• Dip a teaspoon into the boiling water. 
• Scoop up a spoonful of cottage cheese batter and drop it into the boiling water. 
• If the dumpling falls apart add a little more flour to the bowl, mix and let rest for 15 minutes. 
• If the next dumpling survives repeat until the pot is comfortably filled with dumplings. 
• Turn the dumplings over and cook for 1 minute. Do not overcook. 
• Scoop out with a large slotted spoon and plunge the dumplings into a large bowl of cold water. 
• Repeat until all the dumplings are cooked. 
• Drain the dumplings into a large sieve. 
• Run cold water over them until the water runs clear. 
• Let the dumplings drain for ten minutes. 
• Transfer dumplings into a heatproof serving bowl and pour melted butter on the top. 
• Place a microwaving plastic dome on the top and reheat dumplings until piping hot. 
• Sprinkle the top with chopped dill weed and crumbled bacon bits if using. 
• Serve the dumplings with sauerkraut and caramelized onion slices.

20.2.14

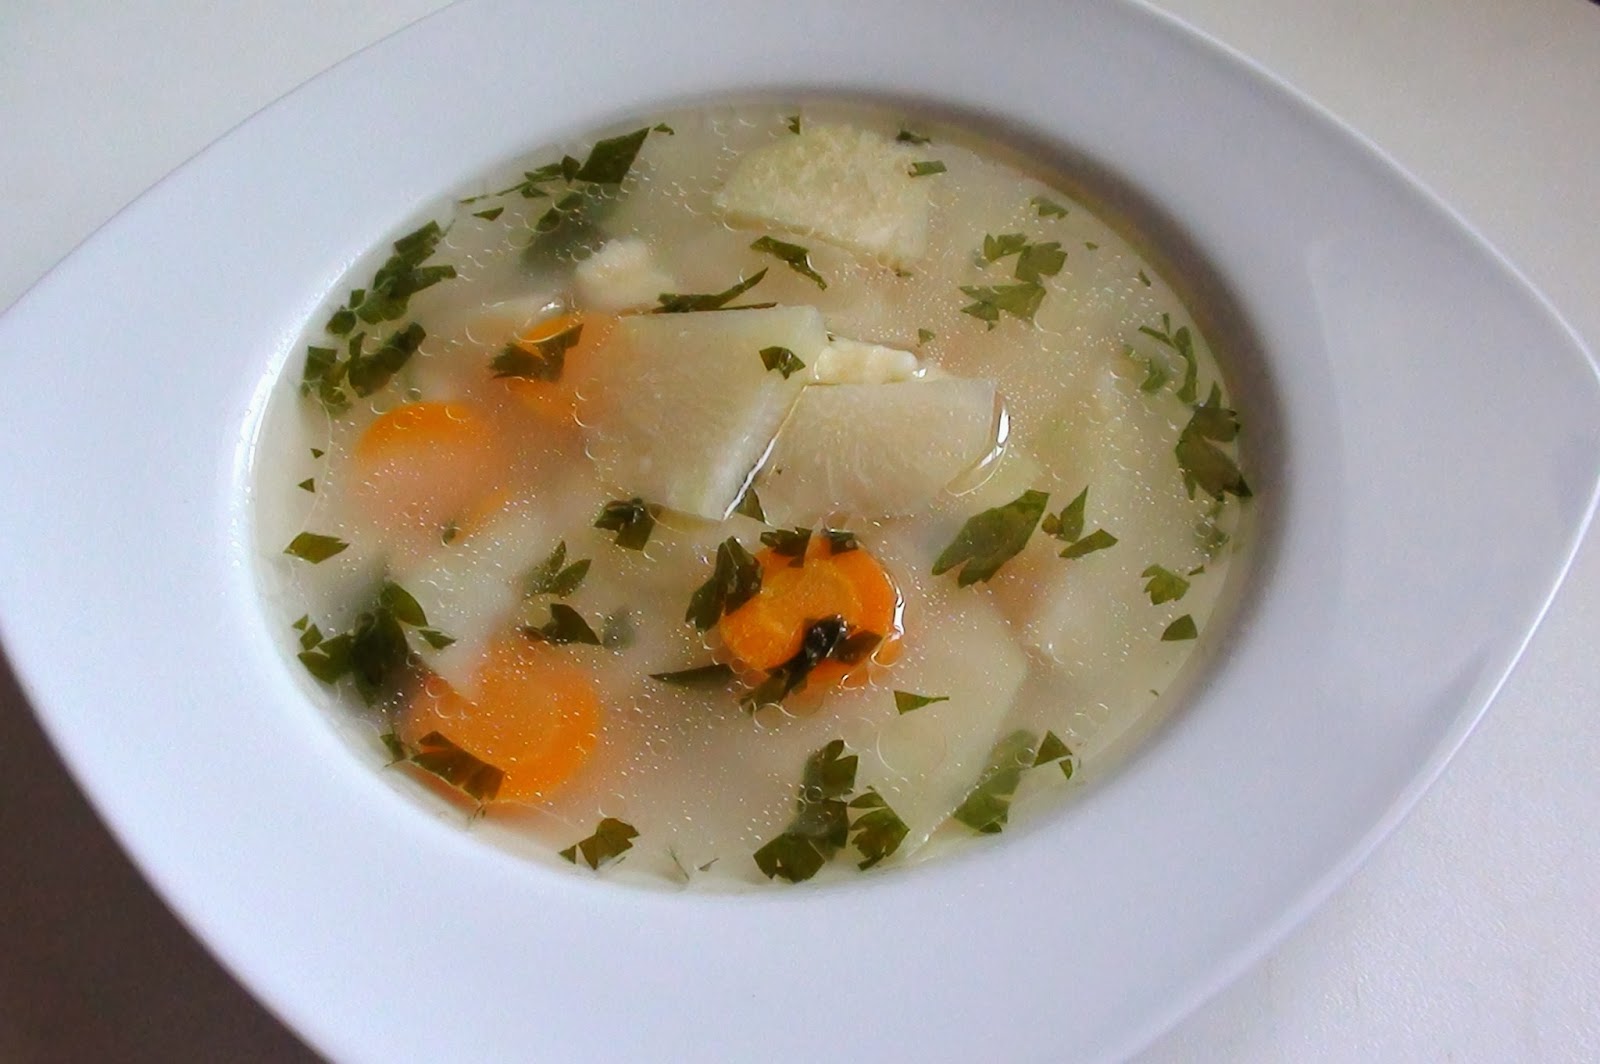
KOHLRABI SOUP - KARALÁBÉLEVES

This is a delicately flavoured soup that takes a short time to make, provided you have homemade chicken or pork stock and a little bit of precooked fine pasta, such as nokedli to add to the pot. My neighborhood supermarket carries a type of dry spaetzle product that can cook right in the soup and will not make the soup cloudy with starch. However most commercial pastas release a lot of starch into the cooking liquid and you don’t want that in the soup. As it happened I had some leftover nokedli from the night before and I put half a cup of it into the soup. 

Now vegetable soups can be delicious on their own, but for a depth of flavour a clear meat stock is preferable to water. Good stock does not come from a can, cardboard box, packet or a cube. Use those at your own peril. They could work with more robust flavourings, but for a delicately flavoured vegetable such as kohlrabi I would avoid using commercial stocks. If you don’t have homemade stock your kohlrabi soup will taste much better with water. 

KOHLRABI SOUP
1 tender kohlrabi 
2 large carrots 
4-6 cups homemade chicken or pork stock [or water] 
1/2 cup nokedli* or precooked fine pasta 
few sprigs of fresh parsley
salt to taste 

• Peel the kohlrabi and the carrots and slice them very thin. 
• Slowly heat the oil in a medium sized Dutch oven. 
• Add the sliced kohlrabi and carrots. 
• Sprinkle lightly with salt. Do not over salt, especially if you use homemade stock for the soup. It will have salt in it already. 
• Sauté the vegetables for five minutes and stir often. Control the heat and make sure the vegetables don’t brown; caramelized vegetables will be unappetizing floating in the soup. You can always add a couple of tablespoons of stock or water to the pot, but don’t add too much liquid at this point. The flavours will not develop if the vegetables are cooked. They have to be sautéed. 
• When the vegetables are tender, add the stock or the water. If you don’t have homemade stock, do not use commercial stock. The soup will taste much better if you use water. 
• Bring the soup to a slow simmer, and add the cooked pasta. 
• Wash a few sprigs of fresh parsley, squeeze out the water and chop them fine on a cutting board. My grandmother used to salt the parsley leaves before chopping them. The salted parsley chops finer and the salt releases the parsley flavour. But taste the soup first if it can handle the additional salt or not. If you miscalculated and the soup is too salty add a bit of water. 
• Add the chopped parsley to the soup and its ready to serve.

19.2.14

ORANGE CHOCOLATE BANANA LOAF CAKE

Looking at the picture, the crumb got me and after that… the flavour. What is it with chocolate and orange flavours melding together? Lindt knows it, Purdy’s knows it; in fact all serious chocolatiers know that orange and chocolate were made for each other. Indeed it is the secret combo in the somlói galuska in that incomparable trifle of trifles from Hungary. There is also banana in this loaf cake and if you leave out the orange flavourings you get a chocolate banana loaf cake. But make no mistake; this loaf cake is about the chocolate and the orange coming together in riotous union. Adapted from Chocolate and Grand Marnier Banana Cake from Baking Obsession, I left out the Grand Marnier and just as I thought the orange zest held its own.  Otherwise I remained faithful to the original recipe. 

ORANGE CHOCOLATE BANANA LOAF CAKE
1 square [1 oz] unsweetened chocolate, finely chopped 
2 cups flour 
1/4 cup cocoa powder 
3/4 tsp baking soda 
1/2 tsp baking powder 
1/4 tsp salt 
1-1/2 cups sugar fine zest of one large orange [do not include the white rind] 
1/2 cup unsalted soft butter 
2 eggs 
1 cup mashed ripe bananas [about 3 medium] 
1 tsp pure vanilla extract 
2 Tbsp Grand Marnier or other orange-flavoured liqueur [optional] 
1/2 cup full fat buttermilk 

 • Preheat the oven to 350F. 
 • Line a loaf pan with parchment paper. 
• Partially melt the chocolate in a microwave and stir smooth. Set aside. 
• Sift together the flour, cocoa powder, baking soda, baking powder, and salt. Set aside. 
• In a small bowl, combine the sugar and orange zest. Rub with your fingers. 
• In a large bowl beat the butter until creamy and fluffy. 
 • Gradually add the sugar and beat on high speed for 4 minutes. 
 • Add the eggs, one at a time, beating well after each addition. 
 • Add the melted chocolate, followed by the banana puree, vanilla, and Grand Marnier if using. 
 • Beat well, scraping the sides of the bowl as needed. 
 • Reduce the speed to low. 
 • Add the dry ingredients in three additions alternating with the buttermilk mixing just to combine. Do not overbeat. 
• Scrape the batter into the prepared pan and smooth out the top. 
• Bake until a cake tester inserted in the center comes out clean, about 1 hr and 15 minutes.


18.2.14

DEER CHOPS

We lived in Prince Rupert from 1967 to 1972. Jim's caseload included the Haida Gwaii, formerly known as the Queen Charlottes. The island has no large predators and the only large game there is the Sitka blacktail deer. Back then the deer used to be so plentiful that you could hunt them year around without restriction. And we ate lots of it. I was always on the lookout for new ways of preparing deer meat. Someone told me to sear the roast in the fry pan before placing it in the oven and that is how I generally prepared it. I didn't care for the gamy flavour, but that may have had something to do the way Jim processed it. But it was cheap and raising a family on a social worker's salary had it's limitations. Of course Jim was no real hunter. The first time he came upon a group of deer he shot into the air. All the deer ran off, except one. It just stood there looking at him with his big brown eyes. That night he came home and told me he killed Bambi. 

The real hunter of the family is our son in-law. These deer chops came from one of his kills. It didn’t seem worthwhile to make vadas from just two chops so I prepared them like the deer roasts I used to make in Rupert. I was a bit concerned about drying out the meat, but nothing doing, they were succulent and soft like butter. If you are lucky enough to get a hold of a couple of venison chops it will be a real treat, they taste better than moo steak and are much better for you! 

One last thought… there is no such thing as bad tasting game, only badly processed game. Once an animal is shot, that is when the real work begins. What you do from that point will determine if you end up with lovely meat or not. Pick your butcher carefully. Sample his products and make sure he doesn't mix the game he receives for processing. You don’t want to end up with meat from an improperly handled animal. Last year's black bear the butcher made into pepperoni. It was the best pepperoni I ever tasted. 

DEER CHOPS
2 deer chops 
2 Tbsp olive oil 
salt and pepper to taste 
2 thick slices of bacon cut in half 

• Preheat the oven to 375F. 
• Remove the membrane from the chops. 
• Lightly salt and season the chops. [The bacon is already salty] 
• Place an ovenproof fry pan on medium high heat. 
• Add the olive and heat up the oil. Do not let it smoke. 
• Add the chops briefly and fry to sear both sides. Do not cook through. 
• Remove the fry pan from heat and place bacon strips over the chops. 
• Cover the fry pan with aluminum foil and place in the oven for 30-40 minutes. 
• Remove the pan from the oven and tent the meat for 15 minutes. This will relax the fibers. 
• Serve the chops with buttery pan fried potatoes.


17.2.14

EGGNOG POUND LOAF

All I want is one glass of eggnog for Christmas. But what to do with the rest? Nobody else in the family wants it. First I made a forgettable eggnog cake that stuck around way too long. Then just before the expiry date on the eggnog I found this pound cake recipe by Joan Hayes of Chocolate, Chocolate and More. It was so good it disappeared almost overnight. This cake will be part of our Christmas baking from now on. I substituted brandy extract for the vanilla and that was good decision. This was the best pound cake I ever made. 

EGGNOG POUND LOAF
Cake: 
3 cups flour 
2 tsp baking powder 
1/4 tsp salt 
1/2 tsp nutmeg 
1 cup butter, room temperature 
2 cups sugar 
4 eggs 
1 Tbsp brandy extract 
1-1/4 cup eggnog 
Glaze: 
2 cups icing sugar 
2-3 Tbsp eggnog 

• Sift together flour, baking powder, salt and nutmeg and set aside. 
• In the bowl of a mixer, cream butter until smooth, slowly add in sugar until all combined. 
• Beat butter on medium speed until light and the color pales. 
• Add in eggs, one at a time; beating well after each addition. 
• Add the brandy extract. 
• Alternating the flour mixture and the eggnog, starting and ending with the flour add in both. 
• Mix just to combine. 
• Spoon batter into two parchment lined loaf pans. 
• Bake in a preheated 350F oven for 50-55 minutes, until toothpick inserted in center, comes out clean. 
• Let cake rest in the pan for 20 minutes before turning it out onto a wire rack to cool. 
• For the glaze, whisk together the eggnog and icing sugar, adding eggnog until desired consistency. 
• Spoon the glaze over the cooled cake. 
• Let glaze set up for a few hours before serving.

15.2.14

DECONSTRUCTED TURKEY

Norman Rockwell forever ruined our turkey feast with the iconic image of a giant bird in "Freedom From Want" Not spectacular art in the first place, but in culinary terms the image produced some disastrous outcomes. And it’s not just the patristic ritual of turkey mutilation. Because really… who cuts turkey at the table? It is a greasy, messy, somewhat gory spectacle. And yet year after year people sit down to a turkey feast and the part they least enjoy is the turkey. A lot of the turkey ends in the trash; parts overdone and parts underdone both. Isn't it time that we tossed that whole Rockwell’s turkey and stopped lying to cooks that they managed to produce a succulent bird? Let’s face it, the turkey was mediocre at best, the white meat was on the dry side, the dark meat was tough, the bottom, a lot of the skin and connecting tissue was slimy and the thin foil wrapped wings were bone dry. 

But try it once my way and you will never roast a Rockwell turkey again. You won’t have to stuff the bird at six in the morning either; the roasting time of cut up turkey is minimal. I had a ten pound turkey and if memory serves me well, it took only three hours at 375F to roast it to delicious perfection. Make the dressing a day ahead and bake it while the meat rests. It will be colourful and delicious and not at all like the soggy, brown stuff people scoop out of the turkey cavity. By the way, did you know that the stuffing is soggy brown from the blood? Now that I destroyed your cherished Rockwell image, let me show you how easy it is to roast a turkey. I had Ted Allen’s recipe on my blog for a long time and then last Christmas I finally roasted a turkey my way. Every bit of it was delicious and nothing went into the trash. How was YOUR turkey dinner? 

DECONSTRUCTED TURKEY
1 turkey 
salt to taste 
2-3 Tbsp olive oil 
2-3 onions, sliced 
ground pepper to taste 
fresh sage leaves 

 • I prefer a fresh bird, but if you trust a frozen brand, go ahead and defrost it slowly in the fridge. It could take several days depending on its size. 
 • Once defrosted, cut up the bird like you cut up a chicken. You will have two legs, two breast pieces and 2 wings. 
• You will also have several backside pieces and a neck. Save these for soup and set aside the liver separately for another use. 
 • Place a clean kitchen towel over one of the breast pieces and hit it with a hammer to crush down the bone and to flatten down the meat. This is to make sure the thickness of the breast meat will be uniform. 
 • Repeat with the second breast piece. Put the kitchen towel in the laundry hamper. 
• Now rinse the turkey parts and pat them dry with a clean kitchen towel. Put the second kitchen towel into the laundry hamper as well. 
• Place the turkey pieces in a large pan. 
• Sprinkle with salt, turning the pieces over so they are well salted. 
• Let the turkey pieces brine in the salt for 2 to 3 hours at room temperature. 
• Drizzle a large roasting pan with olive oil and spread the onion slices on top. 
• Arrange the turkey on top of the onions. 
• Sprinkle the meat with ground pepper and drizzle the top with olive oil. 
• Place fresh sage leaves around the meat.
 • Seal the pan with aluminum foil and place it in the oven. 
• Roast the meat at 375F until tender. 
 • Take off the aluminum foil and set it aside for use later. 
• Continue to roast the meat and start basting it at 15 minute intervals. 
• When the skin is golden brown remove meat from the oven. No need to guess or sink a meat thermometer into the widest part. Once the meat is golden brown, it is ready.
 • Using oven mitts carefully pour off the turkey juices into a pot for the gravy. 
 • Then tent the meat with the reserved aluminum foil. 
• Now put the dressing in the oven. 
 • Make the gravy next. With a large serving spoon remove most of the fat from the turkey juices. Add all the reserved cooking liquids from the potatoes and the vegetables. 
• I thicken my gravy with flour. I combine a couple of tablespoons of flour with COLD water. The mixture should not be lumpy or too thick. Then gradually stir it into the hot turkey juices. Slow simmer the gravy until the desired thickness is achieved. When the gravy is ready, pour it through a fine sieve before placing it into serving bowls or pitchers. The gravy boat barely holds enough gravy for a couple of servings. Sometimes I add sautéed mushroom slices to my turkey gravy.
salted

ready to serve

Privacy & Cookies

This site uses cookies. By continuing to use this website, you agree to their use. To find out more, including how to control cookies, see here: Cookie Policy

Translate

me

My photo
It began with posting a few recipes on line for the family. "zsuzsa is in the kitchen" has more than 1000 Hungarian and International recipes. What started out as a private project turned into a well visited blog. The number of visitors long passed the two million mark. I organized the recipes into an on-line cookbook. On top of the page click on "ZSUZSA'S COOKBOOK". From there click on any of the chapters to access the recipes. For the archive just scroll to the bottom of the page. I am not profiting from my blog, so visitors are not harassed with advertising or flashy gadgets. The recipes are not broken up with photos at every step. Where needed the photos are placed following the recipe. Feel free to cut and paste my recipes for your own use. Publication is permitted as long as it is in your own words and with your own photographs. However, I would ask you for an acknowledgement and link-back to my blog. Happy cooking!