8.10.14

BROCCOLI CHEESE PATTIES

We are in the arduous process of downsizing, eliminating the superfluous from our lives. To save space for the eventual move, I have been going through paper photos and transferring digital material from hundreds of CDR to DVD and USB devices. The cedar strip canoe that Jim built went to a new and younger home, the piano went too, and a lot of small and big stuff ended up with Saint Vincent de Paul and the Salivation Army. Still we have much more to go through. Jim keeps playing with his lathe, but already talks about selling it. Our aim is to simplify, if we have not used something for the last 3-4 years, in all probability we never will. There is a fine balance between keepsakes and clutter. Even the pantry needs purging, I did not dry fruit, made fruit leather or jam this year. I did not have to, we have too much as it is. Between sorting, organizing and now fall cleaning I have had no time to write on the blog or to read friendly blogs. I turned 65 this year and lately all I want to do after dinner is to put up my 
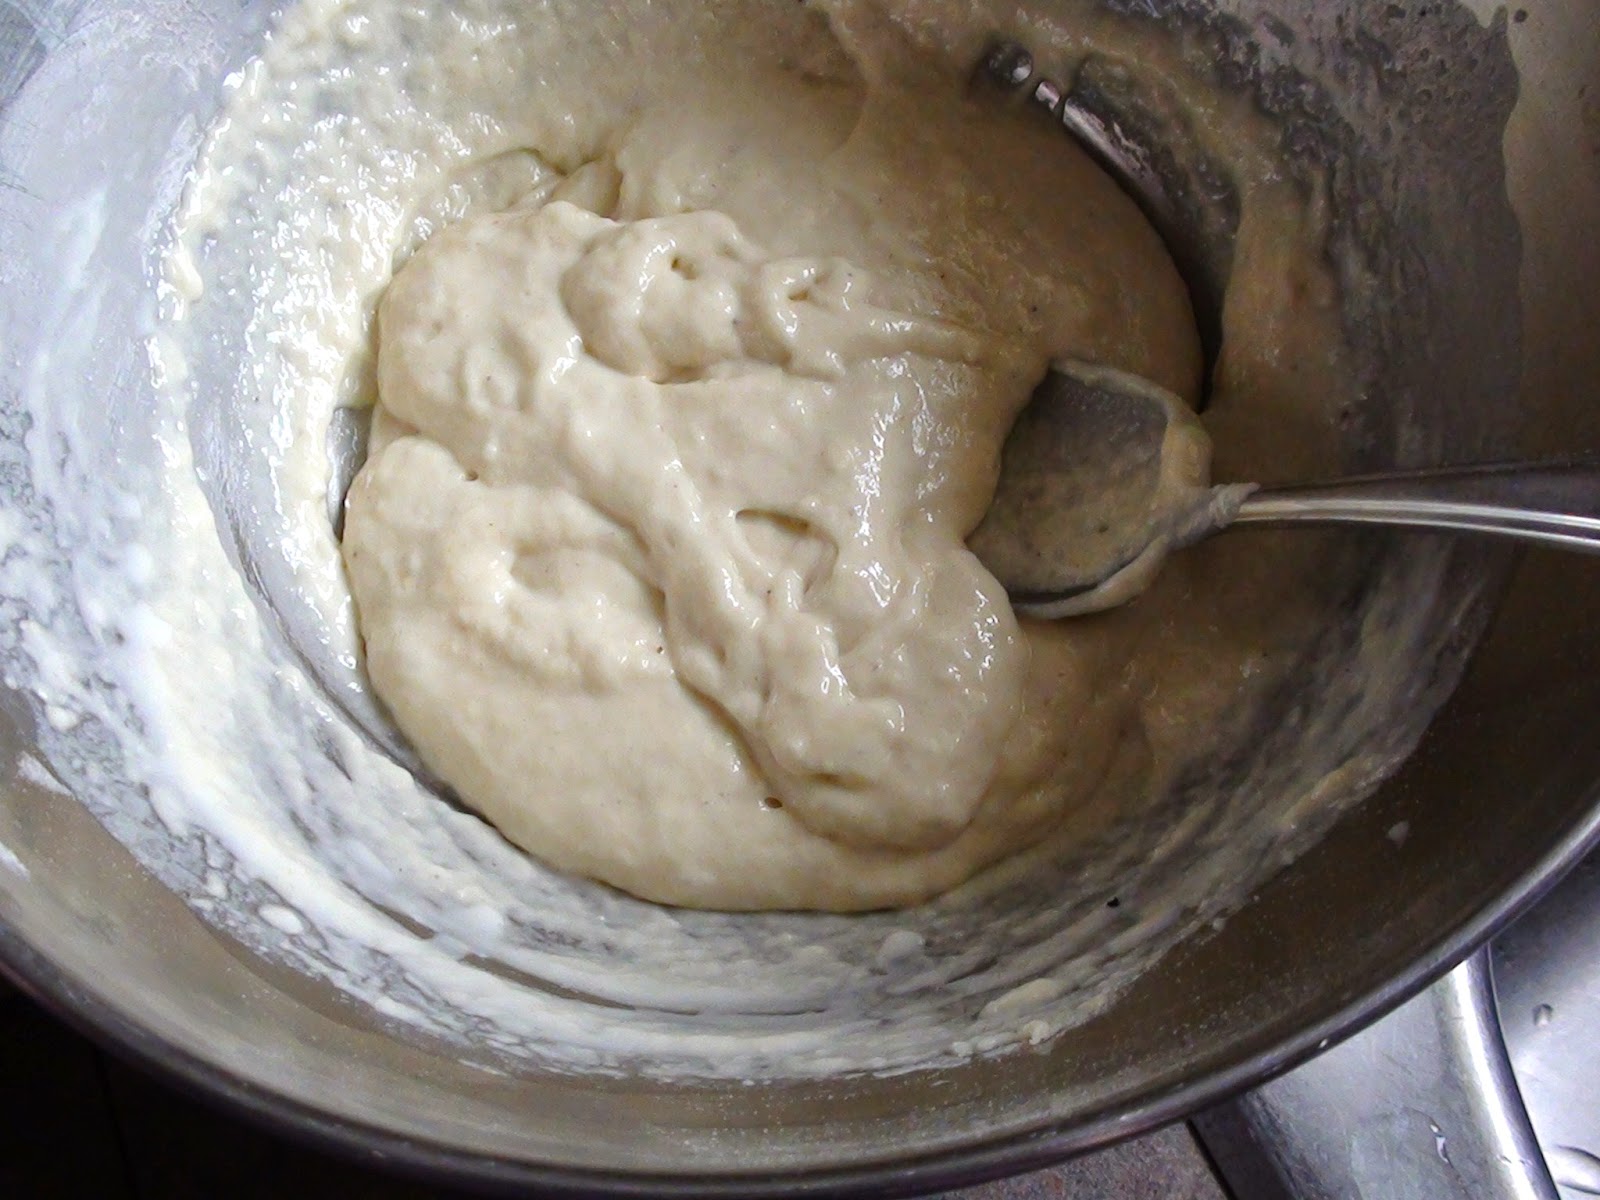
feet and settle down with Netflix. We loved Derek.

Since we had a steady supply of beautiful broccoli, I cooked it, fried it, and baked it, made pasta and various casseroles with it. Since I tend to improvise, most of these dishes remain unrecorded save a few. These patties turned out especially tasty. I added a chunk of slivered Canadian bacon to it. Now back to washing windows and putting the flower gardens to bed and more digital material is awaiting its transfer.

BROCCOLI CHEESE PATTIES
2 to 3 Tbsp oil
1 russet potato, peeled and small cubed
1/2 cup Canadian bacon, diced
1 cup broccoli florets
1/8 tsp garlic powder
1/8 tsp onion powder
3 Tbsp bread crumbs
1/2 cup cheddar cheese, shredded
1/2 tsp salt
1 egg
1/2 cup bread crumbs
1/2 cup oil for frying

  • Heat 2 to 3 Tbsp oil in a non stick skillet on medium. 
  • Add the potatoes and sauté for 5 minutes. 
  • Transfer potatoes to a large bowl and break them up with a potato masher. 
  • Add the Canadian bacon and the broccoli to the skillet and sauté for 2 minutes, or until fork tender. 
  • Add the bacon and broccoli to the potatoes. 
  • Add the garlic and onion powder, 3 Tbsp bread crumbs, cheese, salt, and the egg and combine. 
  • Place remaining 1/2 cup of breadcrumbs in a separate bowl. 
  • Roll the mixture into balls and coat them in breadcrumbs. 
  • Heat the oil in a skillet over medium heat.
  • Fry the patties for 4-5 minutes on each side until golden.


29.9.14

PARMESAN CHICKEN


The preparation IS minimal. All you need to add is a loaf of French bread and a green salad. While those tasteless barbecued chickens fly off the heated cart at dinner time and you are standing in the supermarket for waiting for the next batch to come out, consider taking home a tray of skinless chicken breasts and make this delicious Parmesan chicken. How much better is this, even if the idea comes from a mayonnaise site? If truth be told, brined or salted chicken breasts would be more tasty and succulent, check out Salting Meat, but considering you were ready to take a soggy skinned barbecued chicken home, throwing together this Parmesan chicken could be a huge improvement. 

PARMESAN CHICKEN
2 chicken breast pieces
salt and pepper
1/4 cup mayonnaise
1/4 cup shaved Parmesan cheese 

  • Preheat the oven to 350F.
  • Season the chicken breasts with salt and pepper.
  • Place them in a medium bowl and coat evenly with the mayonnaise.
  • Transfer the chicken breasts to a baking dish and sprinkle the tops evenly with Parmesan cheese.
  • Bake at 350F for 45 minutes. 

28.9.14

CHERRY CREAM SLICE - CSERESZNYÉS KRÉMES

I made this beautiful dessert at the height of the cherry season. I gave the pan away and kept 3 slices. When I handed Jim the last slice I regretted not keeping one more for myself. Make it from fresh ingredients or from convenience products, either way the result will be an outstanding cream slice. The one thing I believe is essential is to make the cherry pie filling from scratch. Use fresh, frozen or canned pitted cherries. If you have to buy canned cherries 2 cans will suffice. One could always resort to commercial cherry pie filling, but the fake flavour and colour would in my opinion spoil the slice. Prepare the first three ingredients and let them cool down to room temperature or prepare them a day ahead. The cream should be whipped just before assembly. These slices are simpler to make than they appear.

CHERRY CREAM SLICE
1 batch of Cherry Pie Filling
1-1/2 cups whipping cream
2 Tbsp icing sugar
icing sugar for dusting

Or
1 pkg of frozen puff pastry thawed overnight in the fridge
2 cups of homemade cherry pie filling
1 pkg of cooked vanilla cream pie filling
1-1/2 cups whipping cream
2 Tbsp icing sugar
icing sugar for dusting

  • Bake two pastry sheets in a 9X12 baking pan.
  • Cut the first sheet while still hot into 18 squares and set them aside. These will go on the top.
  • Bake the second sheet and leave this in the pan. This will be the bottom. Follow the recipe, click on the link, or follow the instructions on the package if using commercial puff pastry. Remember not to stretch the puff pastry and roll it larger than the baking pan. Commercial puff pastry shrinks a lot during baking.  
  • Next prepare the cherry pie filling. Click on the link for the recipe.
  • Make a batch of vanilla bean pudding, click on the link, or follow package instructions. Cooked cream pie filling is better, but if using instant pudding mix, reduce milk in the recipe by 1/3.
  • When everything has cooled to room temperature, spread the cherry pie filling on the bottom pastry.
  • Spread the vanilla pudding over the cherry.
  • Whip the cream to soft peaks, add 2 Tbsp icing sugar and whip until stiff peaks form.
  • Spread the whipped cream over the vanilla layer and arrange the pastry squares on the top, pressing down on them lightly.
  • Chill the pan for a couple of hours and dust the top with icing sugar before serving.


13.9.14

WILD OR FARMED SALMON


While salmon is often recommended as part of a healthy diet, there’s an ongoing debate about whether farmed salmon is actually good for you.

Fish farming has devastating consequences on our oceans and I won’t support the industry. Don’t be fooled by the organic label, farmed salmon has no dietary benefits. You might as well eat the packaging for all the good farmed salmon will do for you. Restaurants that advertise fresh, organic salmon are using farmed salmon. Otherwise the magic word would be "wild".

Farmed fish is bad for the water supply, and the oceans.  In British Columbia where the pacific salmon’s life cycle begins and ends, salmon is a vital part of the ecosystem, indeed the salmon is the sustenance of our forests. The salmon, the wildlife and the trees are all interdependent. 

nine reasons we want fish farms out of B.C. waters


25.7.14

QUICK DOUGHNUT HOLES

Wildfires were burning all around us, it was hot and smoky in Kamloops for too long and not even central air could filter out all the smoke that seeped into the house. I did the rain dance, but nothing worked. Finally, finally a storm was brewing. Temperatures dipped and I stood on the porch inhaling the fresh air as the rain began to pour. It turned into a major storm with flash floods all around town. Yesterday was so cold we had to switch the thermostat from air to heat. The air smelt magnificent.
I put the kettle on and I made a platter of doughnut holes. The heat should return in a few days, but for the time being doughnut holes were perfect. These require no rising time and yet they are light and airy. But the best part is they were on the platter before I could have gone to Tim’s for a pack of timbits.

You scoop the dough into the hot oil, it plops down in a sausage shape, but then it grows into round balls. The funniest thing is to watch the balls flip over as they swell. I used a smallish heavy pot for frying to cut down on oil. There should be at least 2 inches of oil in the pot. I started with 2 cups of extra light olive oil and in the end 1-2/3 cup remained. The trick is to heat up the oil on medium heat and maintain the same temperature throughout the frying. When the little tentacles began to brown, the doughnut holes are cooked through.

QUICK DOUGHNUT HOLES 
1/2 cup + 1/3 cup flour
1 tsp baking powder
1 pinch of nutmeg
1/3 cup sour cream [I used 14%]
1 egg
1 Tbsp sugar
1/8 cup milk [I used 1 %]
2 cups of extra light olive oil for frying

  • In a medium sized bowl, whisk together the flour, sugar, baking powder and the nutmeg.
  • In a separate medium bowl, combine the sour cream, egg, sugar and the milk.
  • Stir the wet mixture into the dry ingredients until a soft dough forms.
  • Let the dough rest for 10 minutes.
  • Meanwhile heat the oil on medium heat. Do not heat it up quickly and then turn it down. The temperature has to be even and steady.
  • Using a regular dinner spoon, scoop up half a Tablespoon of dough and push the dough into the oil with a finger.
  • Repeat until 10 to12 dough balls are in the oil. As the dough swells, it will flip over on its own.
  • Using a slotted spoon, keep turning the dough balls in the oil until it begins to get a little colour. When the tentacles have a nice golden brown colour, quickly transfer the doughnut holes to a paper lined platter.
  • When all the doughnut holes are fried, transfer them to a clean bowl and sprinkle the top with your choice of glaze or icing sugar or grated chocolate and toss.
  • I used a vanilla glaze:
  • Stir together 1 cup icing sugar, 1 Tbsp honey and 1 to 2 Tbsp of milk.


17.7.14

APPLE WALNUT SQUARES - ALMÁS DIÓS PITE

I made these slices last fall when our apple tree was loaded with fresh apples, the crows ate well, and the windfalls were enjoyed by myriad of creatures that thrive in a productive garden. When I venture down I love the insect buzz, they fly, crawl and jump around like acrobats. Mosquitoes are a different story they simply LOVE me. I could never be a gardener.

This Apple Walnut Slice is simply a variation of the classic Apple Squares. You may replace the walnuts with an another nut, excluding almonds of course. Almonds would be overpowered by the apple flavour, rending the addition of nuts unnecessary. Someone once called me a keeper of flavours and for sure I am very much dedicated to the wonderful flavours of my childhood. I am convinced that walnuts are essential ingredients of the Hungarian kitchen. I made a Somlói Galuska with pecans once; it was nice, but not nearly as nice as it would have been with walnuts.

APPLE WALNUT SQUARES
Pastry:
3-3/4 cups flour 
3/4 cup butter, soft
2/3 cup sugar
1 pkg. vanilla sugar
1 tsp salt
1 tsp baking powder
finely grated rind of 1/2 lemon
1/2 cup sour cream
1 egg
Apple Filling:
6 apples
2 Tbsp sugar
juice and finely grated rind of 1/2 lemon
1/4 tsp ground cinnamon
3/4 cup ground walnuts
For Assembling The Squares:
2 handfuls of fine breadcrumb
1 egg, lightly beaten

• Rub the butter into the flour, dispersing it throughout.
• Add the sugar, vanilla sugar, salt, baking powder and finely grated rind of half a lemon.
• Whisk them together to combine.
• In a small bowl combine the sour cream and the egg with a fork.
• Add to the flour mixture and stir to combine.
• Kneed the dough for a couple of minutes and then wrap it up with plastic wrap.
• Place in the fridge.
• Meanwhile prepare the apple filling.
• Wash and peel the apples.
• If using windfalls, cut out the centers and all the blemished parts. You may have to cut the apples into pieces to do this. Grate the healthy apple chunks into a large bowl.
• If using healthy apples, grate them until reaching the cores. Discard the cores.
• By now there is a pool of apple juice in the bottom of the bowl.
• Transfer the grated apple into a large [fine] sieve.
• Take a handful of grated apples and squeeze out the juice and place the squeezed out grated apple into a clean bowl. Save the apple juice and use it for some other purpose.*
• Add the sugar, lemon rinds and the fresh lemon juice and stir to combine.
• Preheat the oven to 400F.
• Cut two pieces of parchment about the size of a 13X4 inch baking pan.
• Place both piece of parchment paper on the board.
• Remove the dough from the fridge and divide it into two equal pieces.
• Place a piece of dough on both parchment papers.
• Press them into rectangles.
• Sprinkle the top with flour and roll out both pieces of dough to fit the parchment papers. • You may have to cut away bits of dough and add to other parts to fit the parchment papers.
• Grasping the parchment, move one of the rolled dough and place it into the baking pan. [with the parchment paper on the bottom.]
• Poke the pastry with a fork at intervals.
• Now lightly scatter 2 handfuls of fine breadcrumbs on the top. 
•Next scatter half the ground walnuts on the top
• Scatter the prepared apple-walnut filling over the ground walnuts. 
• Top with the remaining ground walnuts.
• Grasping the parchment, take the second rolled out pastry and place it on the top of the apple-walnut filling, but this time with the parchment on the top. Remove the parchment paper and discard.
• With a pastry brush, brush the beaten egg yolk onto the top. [there will be considerable leftover egg]
• Poke the top with a fork and place in the preheated oven.
• Bake until top is golden brown.
• Yields 24 squares  


CHOCOLATE SUGAR COOKIES

Chocolaty and perfect, here is one more recipe adapted from Cook’s Country April/May 2013. Their recipes never disappoint and are always developed to perfection. Twenty four pounds of sugar later you just know the recipe they put out is well tested. Keep in mind to cool down the melted butter and for best result use dark brown sugar. Don’t over bake. Next time I will be more generous with sugar, the cookies should be thoroughly dusted both for looks and for balancing sweet and bitter. The more you flatten the cookies the crisper they will get and the less they will crinkle. I made a mental note to be light handed next time. Yes I will make these again.

CHOCOLATE SUGAR COOKIES
1/3 cup sugar
3/4 cup unsweetened cocoa
1/2 tsp baking soda
1/4 tsp baking powder
7/8 cup butter
1-3/4 cups brown sugar
1 Tbsp vanilla extract
1/2 tsp salt
1 egg
1 egg yolk
1-1/2 cups plus 2 Tbsp flour

  • Preheat the oven to 350 F.
  • Line two baking sheets with parchment paper.
  • Place granulated sugar in shallow dish and set aside.
  • Combine flour, cocoa, baking soda and baking powder in a bowl.
  • Microwave two thirds of the butter until melted
  • Remove melted butter and sir in remaining butter until it fully melts in residual heat.
  • Let the butter cool for ten minutes.
  • Whisk brown sugar, vanilla and salt into butter until no lumps remain.
  • Whisk in the egg and the egg yolk.
  • Add the flour and stir just to combine.
  • Scoop up 2 Tbsp of dough and roll it into the sugar, forming a ball.
  • Place on a prepared baking sheet. Repeat with the rest of the dough.
  • Flatten the cookies to 2 inch diameter with the bottom of a drinking glass.
  • Sprinkle each cookie with 1-1/2 tsp of the remaining sugar.
  • Bake 1 sheet at a time for 15 minutes. Cookies will be slightly underdone in the cracks.
  • Let cool for 5 minutes and transfer to wire racks. 

CHERRY CRUMBLE PIE BARS

One would think Érik A Ropogós Cseresznye is what comes to mind. Well maybe just a little. But actually it is Csekhov’s Cherry Garden. The love of plays goes back to my childhood: the story of love, loss, family and money.

If there is one thing communism can be credited with it is the accessibility of culture. Museums and art galleries were dirt cheap and we went regularly, mostly on Sundays. Instead of church people went to see world class art exhibitions. I had my favourite rooms in the permanent collection. We had season tickets to live theatre and the Philharmony. Work and school distributed them for next to nothing. That’s when I got acquainted with Shakespeare, Chekhov and Molière. I was twelve when I saw my first opera at the Budapest Opera House. The Anvil Chorus in Verdi’s Troubadour sent chills up my spine. I knew I will never be the same. 

We tried to give culture to our children, but the expense and the lack of it in Canada was wholly discouraging. Art is holy and should never be treated as profit. If there was something I can resent in this system is that culture is superfluous. Unfortunately the lack of culture has a dumb down effect. Beyond reality TV and rock concerts there is not much more.


CHERRY CRUMBLE PIE BARS
2 cups flour
1-1/4 cups almond meal or very finely ground almonds
3/4 cup brown sugar
1/4 tsp salt
1 cup butter, cut up
cups homemade cherry pie filling or 1 can cherry pie filling
1 tsp almond extract

  • Preheat oven to 350 degrees F.
  • Line a 13x9x2-inch with parchment paper, over the edges of the pan; set aside.
  • For crust, in a large bowl, stir together the flour, almond meal, brown sugar and salt.
  • Using a pastry blender, cut in the butter until mixture resembles fine crumbs.
  • Remove 1-1/2 cups of the mixture; set aside.
  • Press the remaining mixture evenly onto the bottom of prepared baking pan.
  • Bake in the preheated oven for 15 minutes.
  • Spoon cherry filling over hot baked crust, spreading evenly
  • Sprinkle with reserved crumb mixture.
  • Bake about 40 minutes more or until filling is bubbly and topping is lightly browned.
  • Cool in pan on a wire rack.
  • Lift the baked mixture out of the pan.
  • Invert onto a baking sheet; remove foil.
  • Invert again onto a cutting board.
  • Cut into bars.
  • Makes 24 bars.

14.7.14

STRAWBERRY BARS - EPRES SÜTI

I always loved strawberries. I remember my mom bottling strawberries once. I watched her packing the precious fruit into the bottles and wondered about the futility of four small jars. She said it would be nice to have a taste of spring in winter. Those strawberries never made it to winter; all of it was gone in a week. But I understood.

Mami

I never would have thought that one day I will have the luxury of year around strawberries. Most of it comes from California. They are very nice before Christmas, Valentines Day and Easter. But the very best strawberries are locally grown.


STRAWBERRY BARS
200 g fresh strawberries, chopped
3 eggs
3/4 cup sugar
1/3 cup soft butter
1 Tbsp pure vanilla extract
1 cup flour
5 even sized fresh strawberries cut in half for decoration

  • Wash, hull and chop 200 g of strawberries and set them aside.
  • Quarter the rest of the strawberries and set them aside.
  • Preheat the oven to 350F.
  • Fully line a square baking pan with parchment paper.
  • Beat the egg yolks with sugar and butter and vanilla extract until frothy.
  • Lower the speed and gradually add the flour.
  • In a clean bowl beat the egg whites until stiff peaks form
  • Gently fold the beaten egg whites into the batter.
  • Transfer the cake batter into the prepared pan.
  • Level the top with an offset spatula.
  • Drop the chopped strawberries onto the cake batter. They will sink to the bottom.
  • Place in preheated oven and bake for 30 to 35 minutes.
  • The cake will be ready when the center springs back when gently pressed.
  • Meanwhile prepare the 5 strawberries for decoration.
  • Remove the cake from the oven and let it cool to room temperature on a wire rack.
  • Lightly score the top into nine squares.
  • Sprinkle the top with icing sugar.
  • Place 9 strawberry halves in the center of each square.

CHOCOLATE CHIP GRANOLA BARS

These are soft and chewy and will keep for a week and are oh so easy to make. They sure beat those awful granola bars in the store. Instead of chocolate chips you can add 3/4 cup of dried fruit or replace 1/2 cup of oats with shredded coconut.

CHOCOLATE CHIP GRANOLA BARS
2/3 cup butter
1/3 cup honey
1/4 cup packed light brown sugar
1 large egg
1 tsp vanilla extract
3/4 tsp salt
1-1/2 Tbsp flour
3 cups old-fashioned rolled oats
1/3 cup almond flakes
2/3 cup pure chocolate chips

  • Preheat oven to 350F.
  • Line an 8x8 inch baking pan with parchment paper.
  • In a small bowl, partially melt the butter in the microwave.
  • Stir it smooth.
  • Add the butter, honey, egg, vanilla, salt, and flour until completely combined.
  • Add brown sugar and mix well.
  • Add oats and the almond flakes and mix well.
  • Stir in the chocolate chips.
  • Transfer the mixture to a sheet of parchment paper. The dough will be sticky.
  • Place another parchment paper on the top and press it into shape by hand and roller to fit the prepared pan.
  • Transfer to the prepared baking pan and press down, making sure the surface is flat and even.
  • Bake for about 20 minutes or until set and edges are lightly browned.
  • Allow to cool completely before cutting into bars.
  • Recipe yields 10 bars.


STUFFED PORK LOIN

Although I have never taken to sweet applesauce smeared on my pork, pork, garlic and apples can make for a happy union. The apple is in the stuffing and if I had to change one thing, I would have chopped the celery much smaller. I did not add any liquid to moisten the bread. The apple and the meat juices provided ample moisture. It was a bit of a challenge to stuff the pork loin, but the stuffing was just right in the end. The roast sliced nicely and didn't fall apart. After chilled, it looked especially nice thinly sliced on a tray.

STUFFED PORK LOIN
1 kg boneless pork loin
3-4 garlic cloves, slivered
salt to taste
3 Tbsp olive oil
Apple Stuffing:
4 slices of sourdough bread or light deli rye
1/2 onion
2 stalks of celery
1 apple
1 Tbsp olive oil

  • Wash the meat and pat to dry with paper towels.
  • Butterfly the meat. Watch the video.
  • Place plastic wrap on the top and pound the meat to even thickness with a meat tenderizer.
  • Salt the meat and let it rest at room temperature for 2 hours.
  • Meanwhile prepare the apple stuffing.
  • Cube 4 slices of sourdough bread or light deli rye.
  • Chop the onions and set it aside in a separate small bowl.
  • Place bread cubes in a large bowl and set it aside.
  • Chop the celery and set it aside in a separate small bowl.
  • Peel, core and shred the apple and add to the small bowl.
  • Sauté the onions in 2 Tbsp of olive oil until soft.
  • Add to the bread cubes and toss.
  • Add the celery and the apple to the bread cubes.
  • Season the stuffing and toss.
  • Preheat the oven at 350F.
  • Discard the meat juices and poke holes into the meat.
  • Stuff the holes with garlic slivers.
  • Arrange the apple stuffing along the short end of the meat and roll it up.
  • Secure the rolled up meat with kitchen twine.
  • Drizzle 1 Tbsp oil in the roasting pan and set aside.
  • Place in the meat, drizzle with remaining olive oil and cover.
  • Slowly roast in preheated oven for 3-4 hours or until roast is nicely browned and clear juices run when pierced.  [Thermometer should reach 165F]
  • Baste often for best flavour.
  • Remove from oven and cover with foil.
  • Let the roast rest for 10 minutes before slicing.


13.7.14

BEETROOT FETA AND WALNUT SALAD


Roasting the beets is essential for the flavour and texture to develop. Hugh Fearnley-Whittingstall used a mortar and pestle to pulverize the garlic and the walnuts. I found it simpler to put the garlic and walnuts between two sheets of plastic wrap and hitting it with the blunt side of a meat tenderizer. I have a mortar and pestle too, but I don’t use it for food preparation, its one of the few family heirlooms I have from Hungary.
It used to belong to my great grandmother. My great grandfather was a musician [he played the clarinet] and my great grandma was wildly eccentric. They lived in the outskirts of Makó, where people had outhouses and used potties for the night. One day great grandma went to the market to buy sour cream, but she forgot the jug at home, and since she needed a new potty anyway, she bought a potty and got it filled with sour cream. Grandma, who was a young girl at the time, was absolutely mortified walking through the village with her mother carrying the sour cream filled potty.  

Nice girls used to be chaperoned and great grandma insisted that both parents follow grandma and her sister on dates. The girls talked nonstop to drown out the goings on behind them. Grandma said she was never sure what scared off the prospective suitors, the two of them blabbering or their father’s back drafts. Despite of these undignified events or perhaps because of them, grandma married early.  

 My great grandmother
József Fehérné, Mária Ürge 1880 – 1949

BEETROOT FETA AND WALNUT SALAD
6 beetroots
2 garlic cloves
4 tbsp extra virgin olive oil
1/4 cup walnuts
pinch of salt
1/3 cup feta cheese
1/4 cup coarsely chopped walnuts

  • Preheat oven to 375F.
  • Line a baking pan with parchment paper.
  • Scrub the beetroots, peel and chop into same size pieces.
  • Lay them on the prepared baking pan and drizzle with 2 Tbsp olive oil.
  • Bake until tender.
  • Meanwhile crush the garlic and 1/4 cup walnuts between 2 sheets of plastic wrap with the blunt side of a meat tenderizer.
  • Mix in 2 Tbsp olive oil and a pinch of salt.
  • Remove beets from the oven and arrange on a serving platter.
  • Scatter feta cheese over the beets.
  • Distribute the crushed walnut mixture and the coarsely chopped walnuts on top.

FLAKY ALMOND SQUARES

A good recipe just keeps on giving; it is the case with Hungarian Flaky Pastry. It’s the beginning of all sorts of wonderful confectioneries and it’s so easy to make, I sometimes wonder why I bother with puff pastry. I made these, I think, in the spring.

I had grandiose baking plans for last Christmas, but only a fraction was accomplished and here we are in July and I am still trying to use up some of the ingredients before they get stale or freezer burned. The chocolates are all gone, boohoo, and I had to buy some almond flakes last week. That’s when I remembered I had photos of flaky almond squares in the write me up folder.

I recall past Christmases with immense baking efforts and the times I went to M&M Meat Shop for some flats of frozen bars. We tried various bakeries over the years at great cost with equal measure of disappointment, but the best of times were when I baked and baked and gave boxes and boxes of buttery, chocolaty confectioneries to anyone we knew. I am less inclined to do that these days, baking with butter and good quality chocolate became expensive, heck flour is expensive, plus it’s a lot of work for a fastidious, germaphobe like me. What I wouldn’t touch myself, I won’t unload on others. But it’s been years when I bought cookie tins and a variety of tiny confectionery papers. If I live long enough it will all come to an end and then I hope someone with clean habits will take pity on me. That or back to M&Ms.     

FLAKY ALMOND SQUARES
1 egg lightly beaten
2 cups flaky almonds

  • Prepare one batch of Hungarian Flaky Pastry.
  • Preheat the oven to 400F.
  • Line two baking sheets with parchment paper.
  • Roll out the chilled pastry.
  • Cut to fit the parchment lined baking pans.
  • Place the pastry on the prepared pans.
  • Spread the tops with the beaten egg and scatter flaky almonds on top.
  • Bake in the preheated oven until golden brown. Keep an eye on it, flaky pastry can bun very quickly.
  • Remove from the oven.
  • Immediately cut to the desired shapes. Once the pastry cools, it is not possible to cut pastry without  breaking it apart.

STUFFED MUSHROOMS

I don’t think that boiling some frozen thing in a pot of water is a satisfying way to eat my vegetables. It takes a bit of an effort to make vegetables interesting, but the good news is though they tend to require a bit of prep work; vegetable based dishes cook a lot faster than meat based meals. No I haven’t gone over to the green side, but we eat less meat of late. Stuffed Mushrooms is one of several vegetable based sides I’ve been making regularly.

After one gloriously failed stuffed mushroom recipe, I decided to stuff the mushrooms my way. The taste tends to vary with the ingredients I have on hand. But whatever ingredients I use, the breadcrumbs, onion, garlic and the fresh parsley is a constant. You need only TINY AMOUNTS to stuff even the largest mushrooms. Sometimes I put diced red bell peppers or bits of white cheddar into the stuffing. The stuffing should be a bit crumbly, never soggy, soft or pliable. Use only hard, white cheeses, avoid orange cheddar.

Unless you bake a larger amount of mushrooms, baking three is a frivolous waste of energy. Bake these in a toaster oven or try to combine it with some other food item. In this case I baked the mushroom caps toward the end tale of a large Baked Sweet Potato.  

STUFFED MUSHROOMS
3-4 large mushroom caps
diced mushroom stems
1 Tbsp olive oil
1/8 cup diced onions
1 diced garlic clove
2 Tbsp fine bread crumbs
3-4 sprigs of fresh parsley, finely chopped
1 Tbsp Parmesan cheese
salt and pepper to taste
1 Tbsp heavy cream
sprinkling of of Parmesan cheese for the top

  • Preheat the oven to 400F.
  • Wash off the dirt and dry the mushrooms with paper towel.
  • Cut off the stems, dice and place in a small bowl.
  • Heat the oil in a non stick skillet and add the onions.
  • Cook on medium heat until soft.
  • Add the onions and the remaining ingredients to the bowl and combine.
  • With a small spoon, fill each mushroom cap with the stuffing.
  • Place in a baking dish and bake in preheated oven until cheese on top is slightly browned.
  • [If using a metal pan, line it with parchment paper.]


Privacy & Cookies

This site uses cookies. By continuing to use this website, you agree to their use. To find out more, including how to control cookies, see here: Cookie Policy

Translate

me

My photo
It began with posting a few recipes on line for the family. "zsuzsa is in the kitchen" has more than 1000 Hungarian and International recipes. What started out as a private project turned into a well visited blog. The number of visitors long passed the two million mark. I organized the recipes into an on-line cookbook. On top of the page click on "ZSUZSA'S COOKBOOK". From there click on any of the chapters to access the recipes. For the archive just scroll to the bottom of the page. I am not profiting from my blog, so visitors are not harassed with advertising or flashy gadgets. The recipes are not broken up with photos at every step. Where needed the photos are placed following the recipe. Feel free to cut and paste my recipes for your own use. Publication is permitted as long as it is in your own words and with your own photographs. However, I would ask you for an acknowledgement and link-back to my blog. Happy cooking!