26.9.11

OVEN BAKED PLUM JAM – SZILVALEKVÁR SÜTŐBEN

Hungarian jam is thick and plum jam is probably the thickest. Making plum jam traditionally is a chore, you have to stand at the stove stirring for hours at end and all the while hot jam is spurting on you, on the stove and its vicinity. I don’t know exactly where the oven baking idea came from, certainly there are recipes on the web, but from what I have seen they are not as thick as they should be. Great aunt Lizi baked it in the oven forty years ago and she prided herself with her “no splatter jam”.

For convenience baking time is divided into 2 parts. Time the first part at 300F for 10 hours. After that reduce the temperature to 90F and bake at that temperature for 10 more hours. This part is best done overnight. The following morning take out the black deliciousness and pack it into jars. Once this jam cools, it will be even thicker. This one is the perfect jam for making barátfüle.

OVEN BAKED PLUM JAM
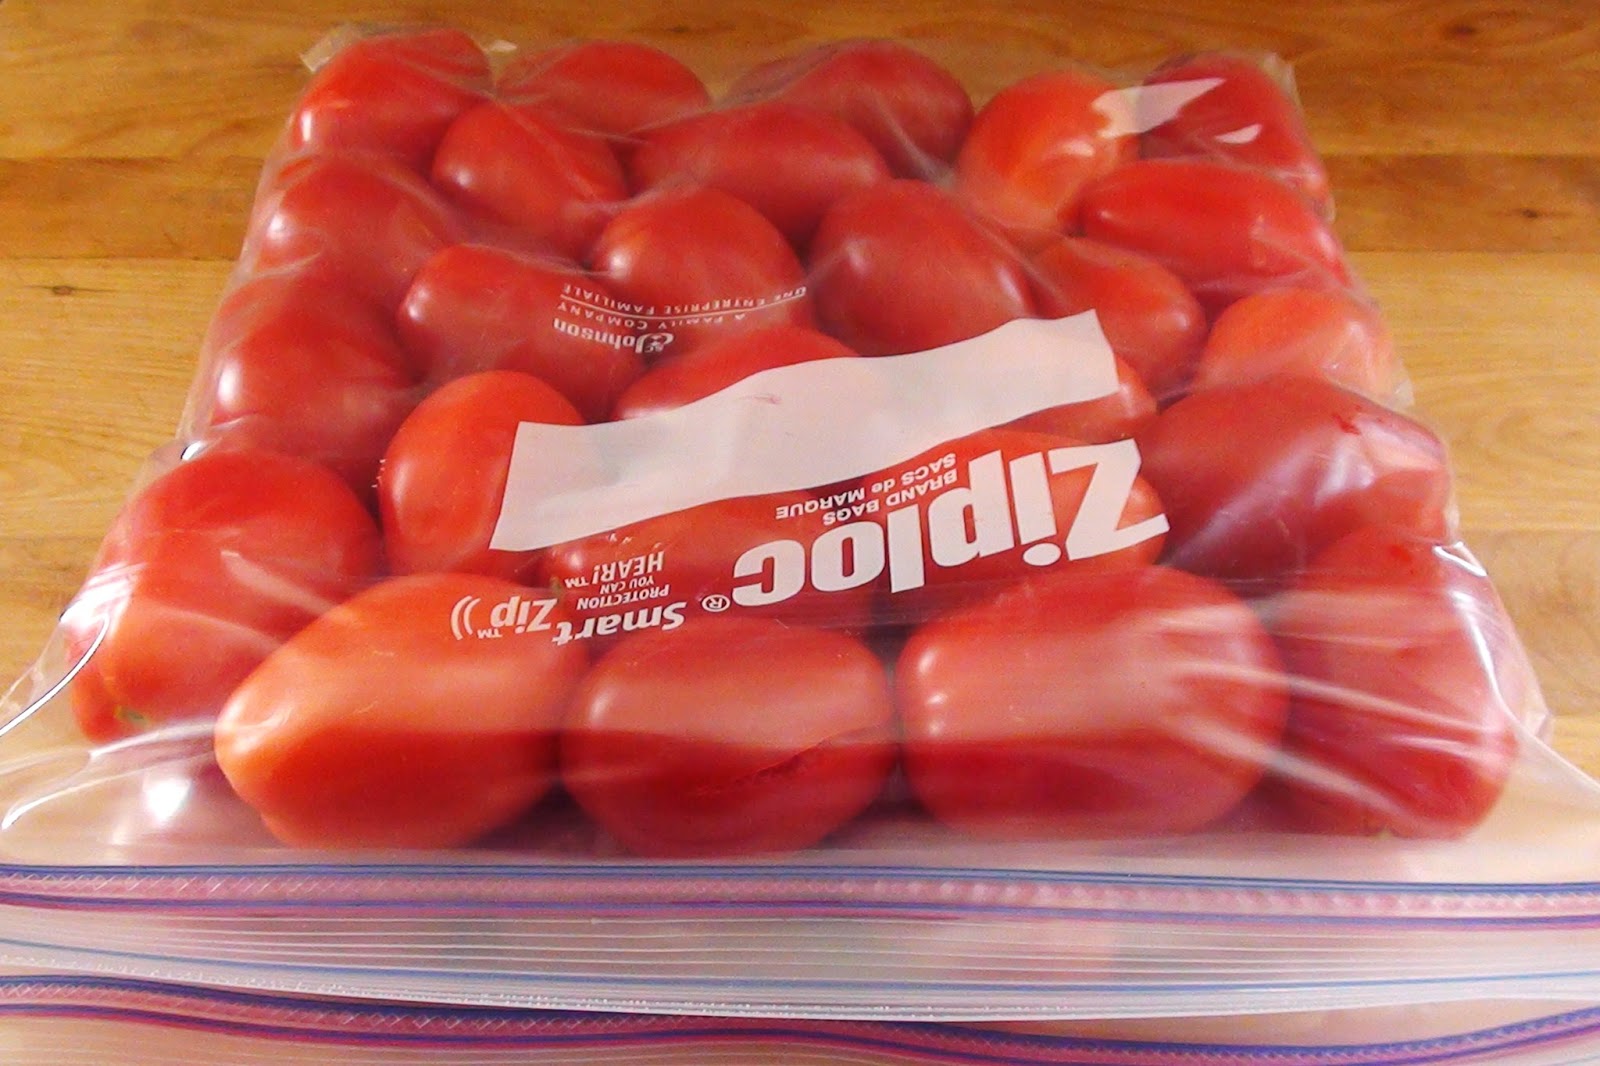
12 cups of crushed plums
6 cups of sugar

• Use the ripest plums you can find.
• Wash the plums well and drip dry.
• Cut plums in half and remove the stones.
• Crush the plums in a food processor.
• Preheat the oven to 300F.
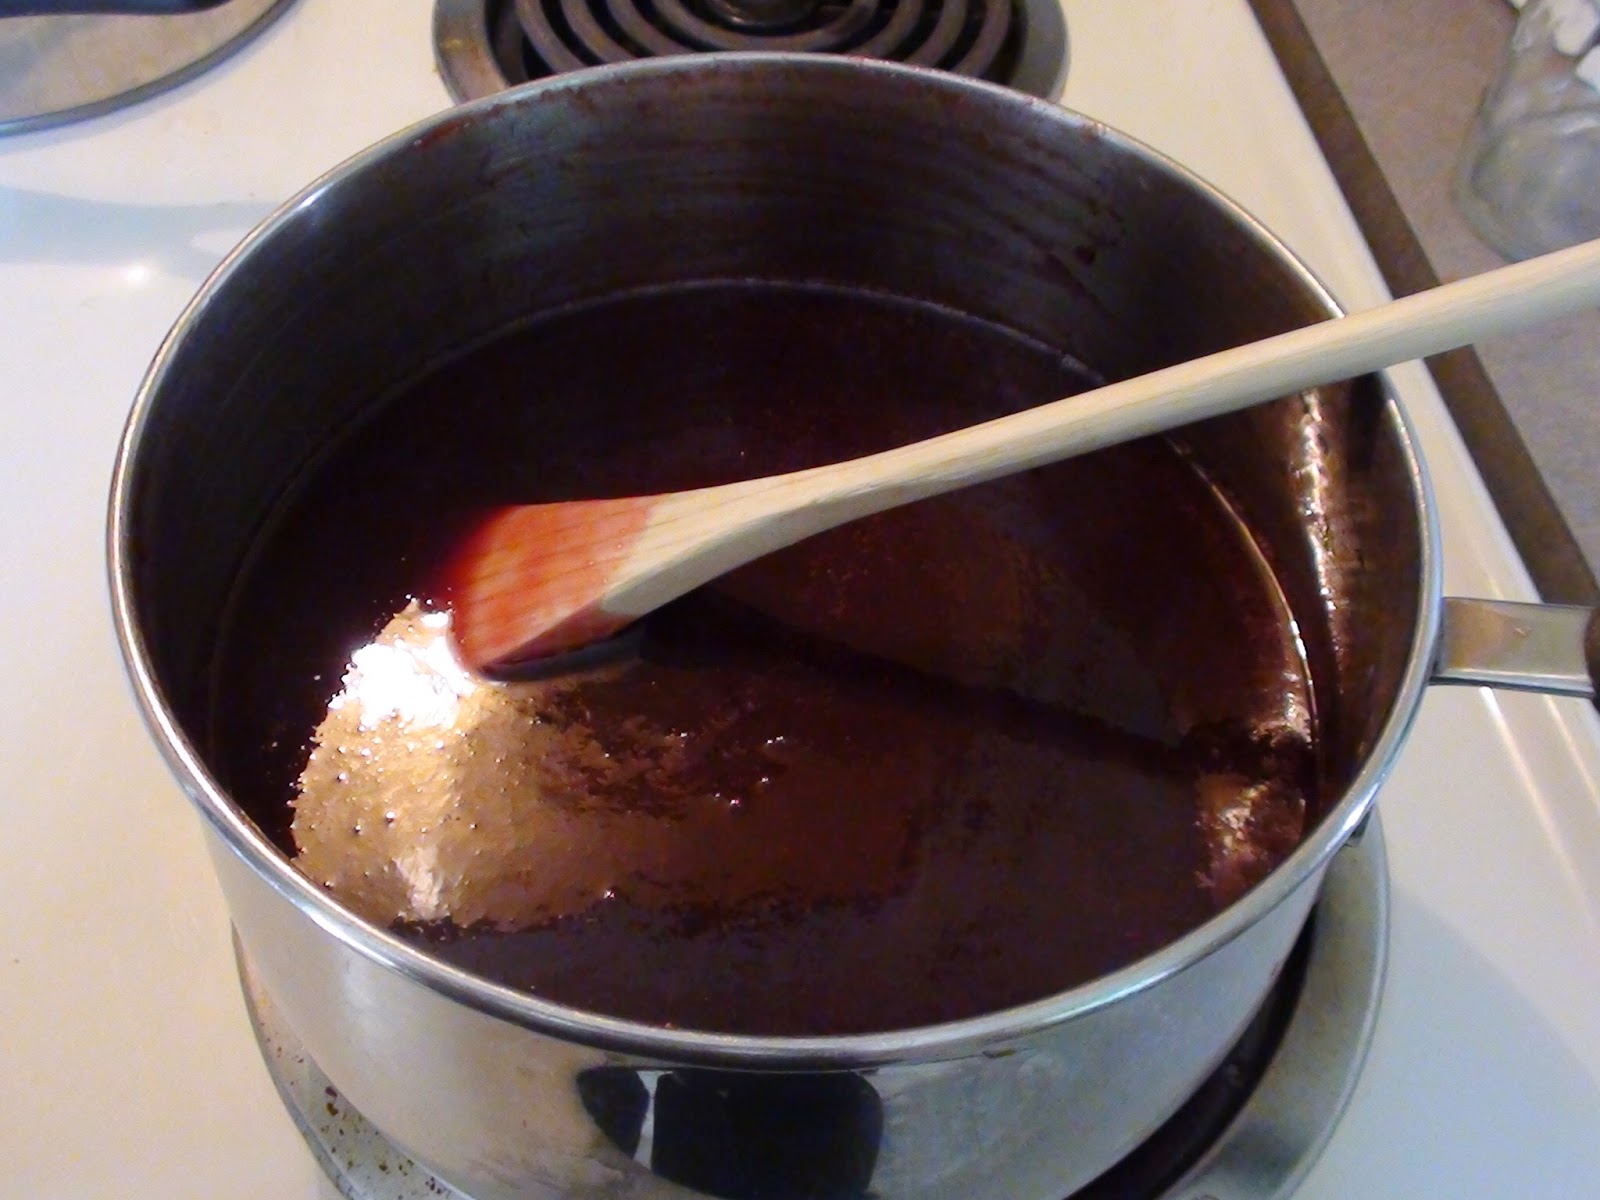
• Place the crushed plums in a large saucepan.
• Add the sugar and stir.
• Gently cook until the color is a vibrant purple.
• Transfer the hot fruit mix to a large pan and place in the preheated oven.
• Do not cover.
• Bake the jam at 300F for 10 hours.
• Reduce the heat to 90F and leave the jam in the oven for 10 hours.
• The following morning pack the jam into hot sterilized jars.
• Wipe the rims, place on the snap lids and screw on the caps. Check the box and make sure to follow manufacturer’s suggestion for softening the cap seals. In the past we had to boil the caps for 5 minutes to soften the seal. Recently purchased caps had to be heated only with boiling water.
• Place the jars in 210F oven for 40 minutes or until jars are very hot to the touch.
• Prepare a dry pack: line a basket or a box with tea towels.
• Remove from the hot bottles from the oven and transfer them to the prepared dry pack.
• Encase the dry pack into an old quilt or several blankets and leave it to cool.
• By evening the jars will still be warm; they will also be completely sealed.

25.9.11

OVEN DRIED PLUMS

We have a large fruit drier, but I prefer oven dried fruit. There are contradictory instructions on drying fruit in the oven though. I don’t believe it is necessary to add sugar or seasoning, most fruits are sufficiently flavourful and sweet without flavouring. The only thing I would add to peaches and apricots is a sprinkle of Fruitfresh to keep them from oxidizing. Plums do not require it because oven drying naturally darkens the fruit. Most instructions begin with lower temperatures, “so the fruit will not burst and loose all its flavour in the catching tray” and to increase the heat to quickly finish the drying process. That's wrong. There is a fine line between dried and burned fruit and if anything the second stage of drying requires even lower temperatures than what we start out with. It will take longer, but it's worth it.

OVEN DRIED PLUMS

• Wash and pat dry plums.
• Cut in half and remove the stones.
• Lay the plums on cookie racks and place the cookie racks over rimmed baking pans.
• Place the baking pans in the oven and turn the temperature to 120F.
• Leave the fruit dry for 6-8 hours, occasionally opening oven door to let the steam escape.

I had a lot of plums; about one shelf was full of cookie racks and with catch trays underneath them. With fewer plums, the drying time would be considerably less. Of course with two oven shelves full of plums, this first stage would require more than 8 hours and even some shifting of the upper and lower trays. With a single oven rack packed up, after 8 hours there was quite a bit of plum syrup in the catch trays and the plums were still soft. This completed the first stage.

• For the next stage reduce the oven temperature to the lowest possible setting and leave the fruit for an additional 6-8 hours to finish up the drying process. [I left it to dry overnight]
• Eight hours later the second stage was over and the plums were ready to come out of the oven.
• I let the plums cool and packed them into parchment lined cookie tins. They are delicious!

CANDIED FRUIT - KANDÍROZOTT GYÜMÖLCS

 candied peaches and plums

Candied fruit, crystallized fruit or glacé fruit, has been a popular fruit preservation method dating back to the 14th century. The general principle is to boil the fruit, steep it in increasingly strong sugar solutions and then dry out all the remaining water. Depending on the size and the type of fruit used, the process can take from several days to several months. The continual drenching of fruit in syrup replaces the fruit’s water content with sugar to prevent spoilage.

The following recipe requires little actual preparation and the candied fruit is ready to use in 14 to 15 days. You will need about 1/2 kg or roughly 1 pound of prepared, fresh, ripe but firm fruit, water and sugar. Do not mix fruits, candy each type of fruit separately. *May use peeled, sliced and cored pineapple; halved, skinned and stoned peaches, nectarines or apricots; halved and stoned plums; stoned cherries, even carrot slices can be candied.

Candied fruit can be used in torts, sweet breads, cookies, or decorating such. Rolled into sugar and then boxed, candied fruit makes a fine confectionery gift.

CANDIED FRUIT
1/2 kg prepared fruit of choice*
2-1/2 cups boiling water
3-2/3 cups sugar to be added gradually

Day 1:
• Place the fruit and water in a pan and cook fruit until just tender.
• Drain off the syrup, reserving 2 cups.
• Place the fruit in a heatproof bowl.
• Pour the reserved syrup back into the saucepan and add 1-1/4 cups of sugar.
• Heat and stir until sugar is dissolved.
• Bring to boil and then pour over the fruit.
• Cover the bowl and fruit soak for 24 hours.

Days 2–7:
• Each day, strain the syrup into a saucepan, leaving the fruit in the bowl.
• Add 1/4 cup of sugar to the syrup and heat until sugar dissolves completely.
• Bring syrup to boil and pour over the fruit.
• Cover the bowl and leave for 24 hours.

Day 8:
• Strain the syrup into a saucepan.
• Add 1/3 cup of the sugar and heat until sugar dissolves completely.
• Add the fruit, bring to the boil, then reduce the heat and simmer for 3 minutes.
• Return the fruit and syrup to the bowl and cover.

Day 9: Do nothing

Day 10: Repeat of Day 8.

Days 11-13:
• Leave the fruit in the syrup. Syrup will be very thick and heavy.

Day 14:
• The fruit has been in thick syrup for 4 days. Drain the fruit well. Do not discard the syrup; there are many uses for it. The peach syrup I have left for instance will be added to the plums I will be preserving next.
• Roll the fruit into sugar and place on a wax paper lined tray to dry.
• Keep candied fruit in a cardboard box lined with wax paper, because mould could form if placed in an airtight container.
 day 1

 day 4

 day 8

 day 14


PLUM DUMPLINGS - SZILVÁS GOMBÓC

It's plum time again! I had a fairly large recipe for Hungarian plum dumplings and rather than dealing with several days of leftovers, I recalculated the recipe for two people. It is easier to double or even triple the recipe should larger quantities be required. I made the dumplings by sight and as I made them I measured out the ingredients.

I also wanted to add a few pointers, because there are a number of things to keep in mind when making the potato based dough for Hungarian szilvásgombóc. It is most important to keep water absorption to the minimum. So always use red potatoes. Baking potatoes are not suitable for this dish; they absorb too much water and besides they have a tendency to fall apart if cooked in whole, yet more water will be soaked up. So always use the red. For the exact same reason cook the potatoes in their skins. Peeling and chopping the potatoes will increase their surface area and that too will increase water absorption. So cook the potatoes in whole. Recipes keep repeating to add the flour while the potatoes are still warm. This is wrong. Once again warm potatoes soak up the flour and the additional flour that will be required will change the overall texture of your potato dough and not for the better. So let the potatoes cool down completely before adding the rest of the ingredients. The dough will still be a bit sticky, so wrap it up and chill it for a half an hour to an hour before rolling it out. Follow my recipe and you will always have beautiful szilvásgombóc.


PLUM DUMPLINGS
3 medium sized red potatoes
1 egg
2 heaping Tbsp soft butter
1-1/2 cups flour
1/4 tsp salt
6 plums
1/4 cup brown sugar
sprinkling of cinnamon
Coating Mix:
2 heaping Tbsp soft butter
1-1/2 cups fine dry bread crumbs
sprinkling of finely ground walnuts
sprinkling of brown sugar

• Cook the potatoes in their jackets.
• Next wash the plums, cut them in half, removing the stones.
• Prepare the cinnamon sugar for the plums.
• In a small bowl combine 1/4 cup of brown sugar with a sprinkling of cinnamon.
[Do not douse with cinnamon; these dumplings are best with just a hint of cinnamon.]
• Add the plums and shake to coat. Set aside.
• Next prepare the crumb mixture.
• Place the butter in a non stick skillet over medium heat.
• Add the bread crumbs, ground walnuts, stirring frequently, until crumbs are golden and crisp.
• Stir in the finely ground walnuts and brown sugar.
• Remove the crumbs from heat and set aside.
• When the potatoes are tender, pour off the water and set them aside.
• Let the potatoes cool completely.
• Peel the potatoes and finely grate them.
• Mix in the soft butter and then add the egg, the flour, and the salt
• Mix to combine.
• On a floured surface kneed the dough lightly.
• Dough will be a bit sticky, so wrap in plastic and place in the fridge to chill for 30 minutes.
• When dough is chilled, roll it out on a well floured surface to 1/2 inch thickness.
• Cut into six 2-1/2 inch squares.
• Place a plum in the middle of each square.
• Pinch the dough to enclose the fruit.
• Make sure to seal the dough encasing the plums and roll into balls.
• Boil a large pot of water and gently slide in the dumplings.
• With a fork gently loosen dumplings from the bottom of the pot.
• Gently simmer dumplings until they float to the top.
• Pour the breadcrumb coating into a medium sized, deep, round bowl.
• One by one, remove the cooked dumplings with a slotted spoon and place it in the bowl with the breadcrumbs.
• Gently shake the dumplings around the bowl to coat.
• Make sure to place the dumpling in the breadcrumb coating as soon as they come out of the boiling water or the breadcrumbs will not stick.


23.9.11

FREEZING TOMATOES

No need to cook them, peel them or anything. Freezing tomatoes is the absolute easiest thing to do. I took a few pictures after harvesting this batch, I wasn’t sure why at the time, but after talking to my friend who spent the afternoon cooking and peeling tomatoes for her freezer yesterday, I decided to write this up.

FREEZING TOMATOES
tomatoes
zyplock bags

• Select healthy, firm tomatoes of any type or size.
• Wash them and drain them.
• Lay them on a clean kitchen towel to dry off all the water droplets.
• When the tomatoes are completely dry, pack them into zyploc bags and freeze.

When you make soup, stew, or anything that requires tomatoes in a sauce, unzip the bag and take out a frozen tomato. Hold the tomato under warm running tap water for a few seconds. Rub it between your hands and the skin will just come off. Now drop the tomato into the pot. It’s that easy. For making lecsó, I lay the skinned tomatoes on a plate and partially thaw them before chopping them up.

21.9.11

OVEN DRIED TOMATOES

I always loved the idea of sun dried tomatoes in olive oil on an antipasto tray, but I didn’t’ care for the leathery things from the store or for the high price that they are, so I make my own.

Pick fully ripe but firm Roma tomatoes for this. Avoid large, juicy ones. There is really no fixed time for making this. Drying time depends on the water content of the tomatoes, the size and the thickness of the slices and the amount of tomatoes in the batch. I had a fairly large batch, so I started in mid afternoon, turned the oven down to 90F for the night and then I finished them the following morning.

*Tomatoes should be softly dry but not brittle. There should be no inner moisture left in them to avoid bacterial growth. If they turn black in parts they have been overdone and the temperature was probably too high.

OVEN DRIED TOMATOES
uniform sized Roma tomatoes
pickling salt

• Preheat oven to 150F.
• Line a rimmed baking sheet with parchment paper and lightly drizzle with olive oil.
• Was and drip dry the tomatoes.
• Cut them in half lengthwise and place cut side up on the prepared cookie sheet.
• Sprinkle pickling salt over the tomatoes. You may add some herbs if you wish.
• Place in the oven and cook very slowly for 10 hours or longer.*
• When the tops are dry, turn the tomatoes over to dry the soft under bottoms.
• Remove from oven and let cool.
• Pack into freezer bags and freeze them. Dried tomatoes retain their color and flavour in the freezer for about a year.
• Shortly before you are ready to eat them pack some tomatoes into a sterilized jar and top it up with olive oil. The leftovers can be safely refrigerated for a couple of months.


RUSTIC TOMATO SAUCE

I have more uses for this rustic tomato sauce I came up with a few years back than for Hungarian tomato jam [paradicsom lekvár]. Finally it makes no difference if you boil the water away in a slow process or remove it right at the beginning. Either way the tomato’s high water content is removed. The only flavouring I use is flat leaf parsley, that way I can use my tomato sauce in just about any recipe. I finish processing the jars part new world [using lids and caps], part invention: heated in the oven and finally finish them in a warm pack or in a dunszt, the ancient Hungarian way of making sure there is a perfect seal each and every time.

RUSTIC TOMATO SAUCE
8 cups prepared tomatoes [about 5 pounds]
1 pack of flat leaf parsley
4 Tbsp bottled lemon juice
3 tsp pickling salt

• Sterilize 4 jars and set aside.
• Fill a large pot with water and bring it to the boil.
• Only use blemish-free, healthy tomatoes.
• Add some tomatoes and continue cooking.
• The tomato skin will first split and then begin to curl up a little. Remove these promptly.
• Peel and core and chop the tomatoes.
• Place the chopped tomatoes in a colander and let stand for 15 minutes.
• Discard the liquid.
• Place 2 cups of tomatoes and some flat leaf parsley in a large pot and bring it to the boil.
• Reduce heat and simmer for 5 minutes.
• Add more tomatoes, 2 cups at the time and continue cooking for 3 minutes after each addition.
• When finally all the tomato is in the pot add the lemon juice and salt.
• Boil hard for 15 minutes, continually stirring.
• Fill the sterilized jars with the tomato sauce.
• Wipe the rims, place on the snap lids and screw on the caps. Check the box and make sure to follow manufacturer’s suggestion for softening the cap seals. In the past we had to boil the caps for 5 minutes to soften the seal. Recently purchased caps had to be heated only with boiling water.
• Place the sealed jars in the oven and process at 220F.
• Prepare a dry pack for the tomatoes: line a basket or a box with tea towels.
• When the bottles are VERY hot, remove from the oven and move them into the prepared dry pack.
• Encase the dry pack into an old quilt or several blankets and leave overnight.
• The following morning the jars will still be warm, but by then they will be completely sealed.


19.9.11

STREUSEL PEACH COFFEE CAKE

Most coffeecakes have to be consumed right out of the oven. And as they cool, they get heavy and stale. So the leftover is dumped. What a waste! But that’s what you get from those stingy 1 egg wonders. The beauty of this coffeecake is it can be eaten the following day and it will still be as light and moist as when you took it out of the oven. No stale, heavy leftovers from this one and it even freezes well. Both the cake and the streusel topping come from my old bread book, well more like a leaflet really, combining two recipes, into one scrumptious coffeecake. There was a coupon on a flour bag that I sent away for this bread book over 40 years ago. The cover is long gone, and since it’s from simpler days when name branding wasn’t everywhere, I no longer can tell what flour mill put it out. Suffice to say, it had to be a Canadian flour mill, one that was selling all purpose flour in Prince Rupert back in the days.

I have been peeking through the oven window, expecting an overflowing anytime now, but so far so good. I used the recommended pan size, but failed to consider the added fruit and the generous streusel topping which wasn’t part of the original recipe. At the very least it’s going to be an interestingly shaped coffee cake. I just peeked and I think it will be alright. The aroma trailing in from the kitchen is sooo seductive... But no guilt, I always share.

STREUSEL PEACH COFFEE CAKE
Cake:
1 cup full fat sour cream
1 tsp baking soda
1/2 cup butter, room temperature
1 cup sugar
1/2 tsp salt
2 eggs
1tsp vanilla
1-3/4 cups cake and pastry flour
2 tsp baking powder
Fruit:
8 small or 4 large peaches [yes you can use canned peaches too, but they will make the coffeecake sweeter]
Streusel Topping:
1/2 cup brown sugar
2 Tbsp flour
1 tsp cinnamon
1/2 cup ground walnuts
2 Tbsp melted butter

• Blanch the peaches first.
• Peel the peaches and cut into segments.
• Add peach slices to a fry pan and add enough water to cover the peaches.
• Simmer for 1 minute and remove from heat.
• Scoop out peaches with a slotted spoon and set aside. [I also saved the peach water and added it to the homemade ice tea I made yesterday.]
• Make the streusel topping next.
• Combine the brown sugar, flour, cinnamon and ground walnuts.
• Add the melted butter and mix to combine loosely.
• Preheat the oven to 350F.
• Combine sour cream and soda in a medium small bowl. It will expand.
• In a large bowl blend butter and sugar together thoroughly.
• Add the vanilla and the eggs separately, beating after each addition.
• Sift the cake and pastry flour with the salt and the baking powder into a medium bowl.
• Add the sifted flour mix alternately with the sour cream.
• Combine well. The entire coffeecake can be mixed with a wooden spoon. I used an egg beater, but was conscious not to overbeat.
• Spray an 8x8 inch or a round cake pan with cooking spray.
• Spread the batter into the cake pan.
• Top with the blanched peach segments.
• Sprinkle the streusel topping over the peaches.
• Place in the preheated oven and bake for 40 minutes.
• Remove pan from the oven.
• Coffee cake can be sliced and served piping hot or cooled down. Delicious every which way!


18.9.11

PLUM CORDIAL - SZILVASZÖRP

Before the days of juice and cola, Hungarians mixed their cordial with soda water. Cordial is  the sugary fruit concentrate that is used to make fizzy non alcoholic drinksRaspberry cordial was the most popular but Italian plums make a surprisingly pleasant cordial. 

PLUM CORDIAL
plum puree
1 cup of sugar for every cup of plum puree
Fruit Fresh

• Wash the plums and remove the stones. Discard blemished fruit. Keep only the healthy.
• Using a blander or food processor, puree the plums in batches.
• Pour the pureed plums into a large measuring cup.
• Make a note of the amount and then transfer the pureed fruit to a large heavy pot.
• Measure out the sugar, 1 cup for every cup of pureed plums.
• Add the sugar to the pot and stir to combine.
• Bring to the boil. Boil for 4 minutes, stirring occasionally.
• Remove pot from the heat. The plums will have a vibrant color and the consistency will be like a smooth sauce.
• Place a large sized fine sieve over a bowl or a pot.
• In batches pour the plums into the sieve.
• Let the liquid drip and help it along with a large wooden spoon. This is a bit tedious and time consuming, but don’t use your fingers, not only because it’s still hot, but you don’t want to add skin cells to the cordial. Some people prefer to use cheesecloth; I prefer a fine sieve and a wooden spoon.
• When all the fruit is strained discard the pulp.
• Strain the liquid one more time and transfer into a pot.
• Bring to the boil, but just, and then pour into hot sterilized jars.
• Add 1/2 teaspoon of Fruit Fresh to each jar.
• Wipe the rims, place on the snap lids and screw on the caps. Check the box and make sure to follow manufacturer’s suggestion for softening the cap seals. In the past we had to boil the caps for 5 minutes to soften the seal. Recently purchased caps had to be heated only with boiling water.
• Place the jars in 210F oven for 40 minutes or until jars are very hot to the touch.
• Prepare a dry pack: line a basket or a box with tea towels.
• Remove from the hot bottles from the oven and transfer them to the prepared dry pack.
• Encase the dry pack into an old quilt or several blankets and leave it to cool.
• By evening the jars will still be warm; they will also be completely sealed.


VERY LIGHT CHEESECAKE

I have been trying to come up with a low calorie cheesecake and I was beginning to think that it was an oxymoron until I saw this recipe on With a Glass. This was exactly what I was looking for! One of the quickest desserts I ever made and imagine a cheesecake with only 557 calories! I made it today and it was a huge hit. The only thing I would do differently is to use a smaller spring form cake pan, I do have one and it will make this cheesecake considerably higher. 

I never used quark before and I found the taste of this soft cheese product extraordinary. I paid over 8 dollars for the 500 g tub. [It works out to be exactly 2 cups] Add to that the cost of a vanilla bean and it’s not exactly a thrifty dessert. But for people who can’t afford New York cheesecake with 1080cal and 76g of fat per slice, this cheesecake is a wonderful alternative. 

VERY LIGHT CHEESECAKE
2 cups quark
3 Tbsp water
1 vanilla pod
4 Tbsp sugar
3 Tbsp Splenda
1-1/2 pkg. Knox gelatine

• Split the vanilla pod and scrape out the seeds into a small saucepan.
• Add the pod too.
• Add 3 Tbsp water and bring to the boil.
• Simmer for 2 minutes and then remove from heat.
• Let it cool.
• Meanwhile lightly spray a 9 inch spring form cake pan with cooking spray. [This is so the parchment will stick to the pan.]
• Fully line the pan with parchment paper and set aside.
• Place the quark, sugar and the Splenda in a medium sized bowl.
• Stir with a wooden spoon to combine.
• Take the vanilla pod out the vanilla infusion and set the pod aside.
• Now place a fine sieve over the bowl and pour the vanilla infusion into the quark mixture.
• Press the vanilla pods through the sieve with a dinner spoon.
• Stir the vanilla infusion into the quark mixture and set aside.
• Place 1/4 cup of cold water in a small bowl and add the Knox gelatine. [Keep in mind that Knox gelatine has to be mixed into cold water and added immediately to whatever you want to gel.]
• Stir to dissolve.
• Add the dissolved gelatine to the quark mixture and stir to combine.
• Scoop the quark mixture into the prepared cake pan and place in the fridge for 3 hours.
• Place the pan in the freezer for 1 hour. This just makes inverting onto a platter a breeze.
• Take the pan out of the freezer, unhook the spring mechanism and invert onto a large platter.
• Decorate as desired.
• Serve with fresh fruit.

17.9.11

TASTY VEGETABLE STEW - FINOM FŐZELÉK

I have no bad memories of Finom Főzelék. It must be that my grandmother didn’t care for it, because she never made it for us, not even in kohlrabi season. No, my torment was her stuffed kohlrabi; no matter how much we complained as soon as there was kohlrabi she made the dreaded dish. Now I love kohlrabi in all sorts of ways just not stuffed with ground pork. I still don’t… I think. I don’t know I never tried to make it. But I digress. The first time I heard of finom főzelék we were standing around in the courtyard of our apartment building chatting away with neighbours. One lady said she made “finom főzelék”. I asked her what it was. She said, carrots, kohlrabi and green peas made into főzelék. And that it was “finom”, which translates into tasty. I remember thinking thank God we didn’t have to eat that at our house! Being a kid, mixing stuff wasn’t appealing, if two different foods touched on the plate I couldn’t eat it.

My husband grows very nice kohlrabi in our garden, so eventually I tried making finom főzelék. It was surprisingly good, we really like it with fasirt. Tender young kohlrabi and garden fresh carrots are a must! I use frozen peas though, [never ever canned] because by the time the kohlrabi is ready the green peas are long gone. This is how I make finom főzelék, I put no corn in it [no corn!] and the thought of making it from frozen mixed vegetables with the limp green beans makes me want to run for the hills. Finom főzelék has to be the old way or not.

TASTY VEGETABLE STEW
2 cups diced carrots
2 cups diced kohlrabi
2 cups frozen green peas
water
roux from 2 Tbsp butter and 2 Tbsp flour
1 fresh parsley sprig, finely chopped

• Clean and peel the carrots and the kohlrabi.
• Chop into uniform bite sized chunks.
• Add to a medium pot.
• Sprinkle with salt and pepper.
• Add water to just cover the vegetables.
• Bring to a boil and reduce to a slow steady simmer.
• Cover the pot and cook the vegetables until almost tender.
• Meanwhile make the roux.
• Melt the butter in a non stick fry pan.
• Stir in the flour and cook until flour is a golden color. Set aside.
• When the vegetables are almost done, add the frozen peas and cook for a couple of more minutes.
• Pour some of the broth into the roux and gently combine.
• Add the thickened broth back into the pot.
• Add the finely chopped fresh parsley and gently stir.
• Cover the pot and let the stew rest for 15 minutes.
• Heat through and serve.

16.9.11

WHITE ALMOND BARK

Jim used to pick up a box of these on his way home at the airport in Victoria. He would arrive and we would all sit down to eat the chocolate. Since his retirement I have been making it myself. I use Callebaut bulk chocolate. Whatever brand is available where you live, I cannot stress enough to use the very best brand of white chocolate you can get. White chocolate is less forgiving then dark chocolate. White chocolate burns easily and can overheat rather quickly. If the white chocolate is in danger of overheating, quickly stir in some more white chocolate bits. This will cool the mixture. Some recipes have added butter and extracts for flavouring. However, it is not a good idea to add liquid to melting chocolate. Liquid makes chocolates seize up and after that all it will be good for is making hot drinks. [See more about melting chocolate here]

WHITE ALMOND BARK
1 cup whole raw almonds [unsalted]
12 squares white chocolate, chopped [12 oz or 340 g of white chocolate squares]

• Preheat oven to 350F.
• Lightly spray a rimmed baking sheet with cooking spray.
• Place the almonds on the pan and roast them for 5 to 10 minutes.
• Meanwhile, place a stainless steel bowl over a pot of barely simmering water. Make sure the bottom of the pan does not touch the simmering water.
• Place the white chocolate in the bowl to melt.
• When almost all of the white chocolate has melted, remove from heat and set the bowl on the counter.
• Stir continuously until it is shiny, smooth, and completely melted.
• Never heat white chocolate beyond 80-82°F (27-28°C). If the white chocolate has reached the maximum temperature and still is in chunks, do not heat it any longer, just keep stirring.
• Next, line a tray with wax paper.
• Arrange the roasted nuts on the wax paper lined tray.
• Pour the melted chocolate over the nuts. Do not worry if some of the nuts move out of place.
• Give it time for the bark to set at room temperature.
• Cut or break into pieces and store in a cool place.

15.9.11

VANILLA BUTTERMILK CAKE

This cake is an absolute delight! But before we get there let me tell you about my longstanding quarrel with sloppy writing and with cookbooks that set me up for failure. This one came from Sky High: Irresistible Triple Layer Cakes by Alicia Huntsman and Peter Wynne. Just as the authors promised, this cake is wonderful. It has a perfect crumb and is incredibly moist. Once assembled and settled, it cuts beautiful slices. It is an unusual two bowl cake because it requires very little beating. So what is my problem? The authors failed to include the simple fact that these cakes require to cool and to settle completely before you remove them from the pans. They hint at it, with a suggestion to chill the layers before assembly. Well a lot of good that will do to the already messed up layers? Which they contradict anyway with “let the layers cool for 10 minutes” before inverting. Aside from the fact that I recalculated the 8 inch triple layers for a two 9 inch layers, I made several important changes to the recipe. Call me a neat freak, but I like a neat cake. And I don’t like the bottom of my cake sticking to the plate either. Yes the tops and the sides present a bit of a challenge. The sides of the pan also have to be lined with parchment, not just buttered. And you don’t invert all the layers. You need one layer to stay on its bottom. One more thing! Do not test this cake with a tap on the top, but rather insert a cake tester or a toothpick in the middle to test for doneness. In fact don’t touch the top until assembly period. Let the cake cool completely in the pans and then chill them, still in the pans. And when the layers are nicely settled; then and only then proceed to remove the cakes from the pans. They could have easily added these little details on page 74, half of it remained empty. But why do this? So everybody can have success the first time around? But what would that do to the mystique surrounding the authors?

VANILLA BUTTERMILK CAKE
3 eggs
2 egg yolks
1-1/2 tsp pure vanilla extract
225 ml [not quite 1 cup] 3.25% buttermilk
2-1/4 cups cake flour
1-1/2 cups sugar
3-1/2 tsp baking powder
1/4 tsp salt
6 oz unsalted butter, room temperature
1 batch of lemon curd
1 batch of mousselini buttercream

• Preheat the oven to 350°F.
• Lightly spray the bottom and sides of two9 inch spring form cake pans.
• Line completely with parchment paper, bottoms and sides included. The paper will stick to the sprayed pan.
• Spray the parchment again.
• Place the 3 eggs and 2 yolks in a medium sized bowl.
• Add the vanilla extract and 1/8 cup of buttermilk.
• Whisk well and set aside.
• Combine the flour, sugar, baking powder and salt in a large bowl and whisk to blend.
• Add the remaining buttermilk and the butter to the dry ingredients.
• Blend together on low speed.
• Increase to medium speed and beat for 2 minutes until light fluffy.
• Add the egg mixture in three parts, scrapping down the sides of the bowl after each addition.
• Do not over mix.
• Divide the batter among the two prepared pans.
• Bake the cake layers for 30 minutes, or until a toothpick inserted in the center comes out clean.
• Place the cake pans on a wire racks.
• Let the cake layers cool completely.
• When completely cooled down, place the cakes still in the pans in the fridge.
• Chill for about an hour.
• Remove from the fridge and proceed with the removal.
• Unhook the spring mechanism and remove the ring from one of the cakes. 
• Grasp the bottom parchment, pull off  and carefully slide the cake onto a platter. [do not invert]
• Spread 3/4 of the lemon curd on the top.
• Now unhook the spring mechanism and remove the ring from the other cake.
• Carefully pull the parchment from under the cake. The chilled cake is fairly stable at this point.
• With the flat side up place the second cake on top of the bottom layer.
• Chill the cake with the lemon curd for an hour.
• Remove from fridge; spread a thin crumb coating of mousselini buttercream over the well chilled cake.
• Place in the fridge for 15 minutes.
• Remove cake from the fridge and spread on the rest of the mousselini buttercream.
• Carefully pipe or spoon the remaining lemon curd on top of the cake.
• Chill the assembled cake for half an hour.
• Remove, slice and serve.


MOUSSELINE BUTTERCREAM

This is a stable cream and is excellent for piping. One recipe will cover the top and the sides of a 9 inch cake, leaving sufficient amount for piping. Half the recipe is enough to frost a dozen cupcakes. Often the advice is to chill the mousseline buttercream before use, but this makes it much more difficult to spread or to pipe. I found that chilling the cake or the cupcakes first [for 1-2 hours] makes icing and piping a breeze.

MOUSSELINE BUTTERCREAM
2/3 cup sugar
1/2 cup water
6 egg yolks
1-1/2 cups unsalted butter, soft
2 tsp vanilla

• In a saucepan melt 2/3 cup of sugar in 1/2 cup of water.
• Boil to the soft ball stage, 115 C.
• In a bowl, lightly whisk the egg yolks.
• Gradually pour the yolks into the hot syrup, whisking vigorously.
• Continue whisking for 5 minutes or until pale coloured and thickened.
• Let it cool.
• Beat the butter until pale and creamy.
• Spoon by spoon beat the cooled egg-sugar mix into the butter.
• Beat in the vanilla.
• Spread a thin crumb coating on the well chilled cake.
• Place in the fridge for 15 minutes.
• Remove cake from the fridge and spread on the rest of the cream.


CHOCOLATE MOUSSELINE BUTTERCREAM
• Melt 100 g semi sweet chocolate.
• Let it cool and beat into the cream.

12.9.11

RUM CHERRIES – RUMOS CSERESZNYE


I never made rum cherries before. People write about it as an easy thing to make, but no, it isn’t easy. One of the problems I encountered was not having the same kind of preservative they use in Hungary. So I set up several very small experiments, rum being expensive and all. Two went bad, two other batches worked, but the cherries either shriveled up or lost their color. The last batch I made on my own and finally success! It’s been ready for awhile; I already used half of it for the Russian Cream Torte last weekend. The minuscule amount that remains I poured into a sterilized jar, covered it and put it in the back of the fridge until Christmas. It will be used in a Christmas trifle. What people fail to mention is the fairly large amount of cherry liquor that is the by product of making rum cherries. I am not saying it’s a bad thing. But we shall see if it remains as is, or if it ends up fermenting onto my liqueur cabinet.

The cherries must not be allowed to ferment; as soon as these white bubbles appear on the top: action is required. [I added more citric acid, twice] The citric acid I used came from a U Brew Wine store. “Fruitfresh” is also citric acid, but I don’t think it’s the same as what the wine stores sell. So that is the first thing, get a small package of citric acid from the wine store. Some people advised to use 54-56% rum. Rum sold in B.C. has 40% alcohol content, and that is plenty strong for us. Besides I didn’t want to end up with so much alcohol as not to taste the cherries; I had those before. Might as well just drink the booze and forget about the cherries

The next important thing is to remove all the pits. [In the batch with the pits the cherries shrivelled into tough wrinkled balls] The cherries in bottles all turned brown. So the final thing is put the cherries into a blemish free enamel pot or a fully glazed pottery crock or casserole dish. Don’t use stainless steel or aluminum, but keep the cherries fully covered and in the dark. I don’t think I have to say it, but I will say it anyway. Use only flawless cherries and make sure everything you use to make the rum cherries is very, very clean. Avoid stirring or tasting; I just jiggled the crock a few times, this too can reduce the risk of contamination.

RUM CHERRIES
Fully ripe, blemish free cherries
Fruitfresh
Sugar
Rum
1 pkg. citric acid from the wine store

• Wash the cherries and let them drain.
• Remove stems and the pith.
• Drain well.
• Put a layer of cherries in the pot.
• Sprinkle with 1 Tbsp of Fruitfresh
• Cover with some sugar.
• Continue layering cherries, then with Fruitfresh and finally with sugar until all the cherries are gone.
• Cover the pot and let cherries rest for 3 days. Cherries will release a lot of liquid.
• On the third day top off the cherries with rum.
• .Add 3 Tbsp of citric acid.
• Cover the pot and keep checking the cherries daily. As soon as white bubbles appear add 1-2 Tbsp of citric acid.
• In two to three weeks the cherries will be ready for consumption.
• Pour into sterilized jars and place jars in the fridge. I estimate it will be good for six months or so.
• Pour the access rum cherry liqueur in a clean bottle and place it in the liqueur cabinet. You will know what to do.
• Rum cherries are excellent for cake decorating, puddings, ice cream, cakes, pastries and cocktail drinks.

Privacy & Cookies

This site uses cookies. By continuing to use this website, you agree to their use. To find out more, including how to control cookies, see here: Cookie Policy

Translate

me

My photo
It began with posting a few recipes on line for the family. "zsuzsa is in the kitchen" has more than 1000 Hungarian and International recipes. What started out as a private project turned into a well visited blog. The number of visitors long passed the two million mark. I organized the recipes into an on-line cookbook. On top of the page click on "ZSUZSA'S COOKBOOK". From there click on any of the chapters to access the recipes. For the archive just scroll to the bottom of the page. I am not profiting from my blog, so visitors are not harassed with advertising or flashy gadgets. The recipes are not broken up with photos at every step. Where needed the photos are placed following the recipe. Feel free to cut and paste my recipes for your own use. Publication is permitted as long as it is in your own words and with your own photographs. However, I would ask you for an acknowledgement and link-back to my blog. Happy cooking!